
Today’s guide walks you through the making of a Crochet Yoshi Plushie, a cheerful, round-bellied figure worked in soft worsted weight yarn with that satisfying dense texture only single crochet amigurumi can give. Pull up your favorite playlist, settle into your chair, and let your hook bring this beloved green dinosaur to life.
The Yoshi Plushie
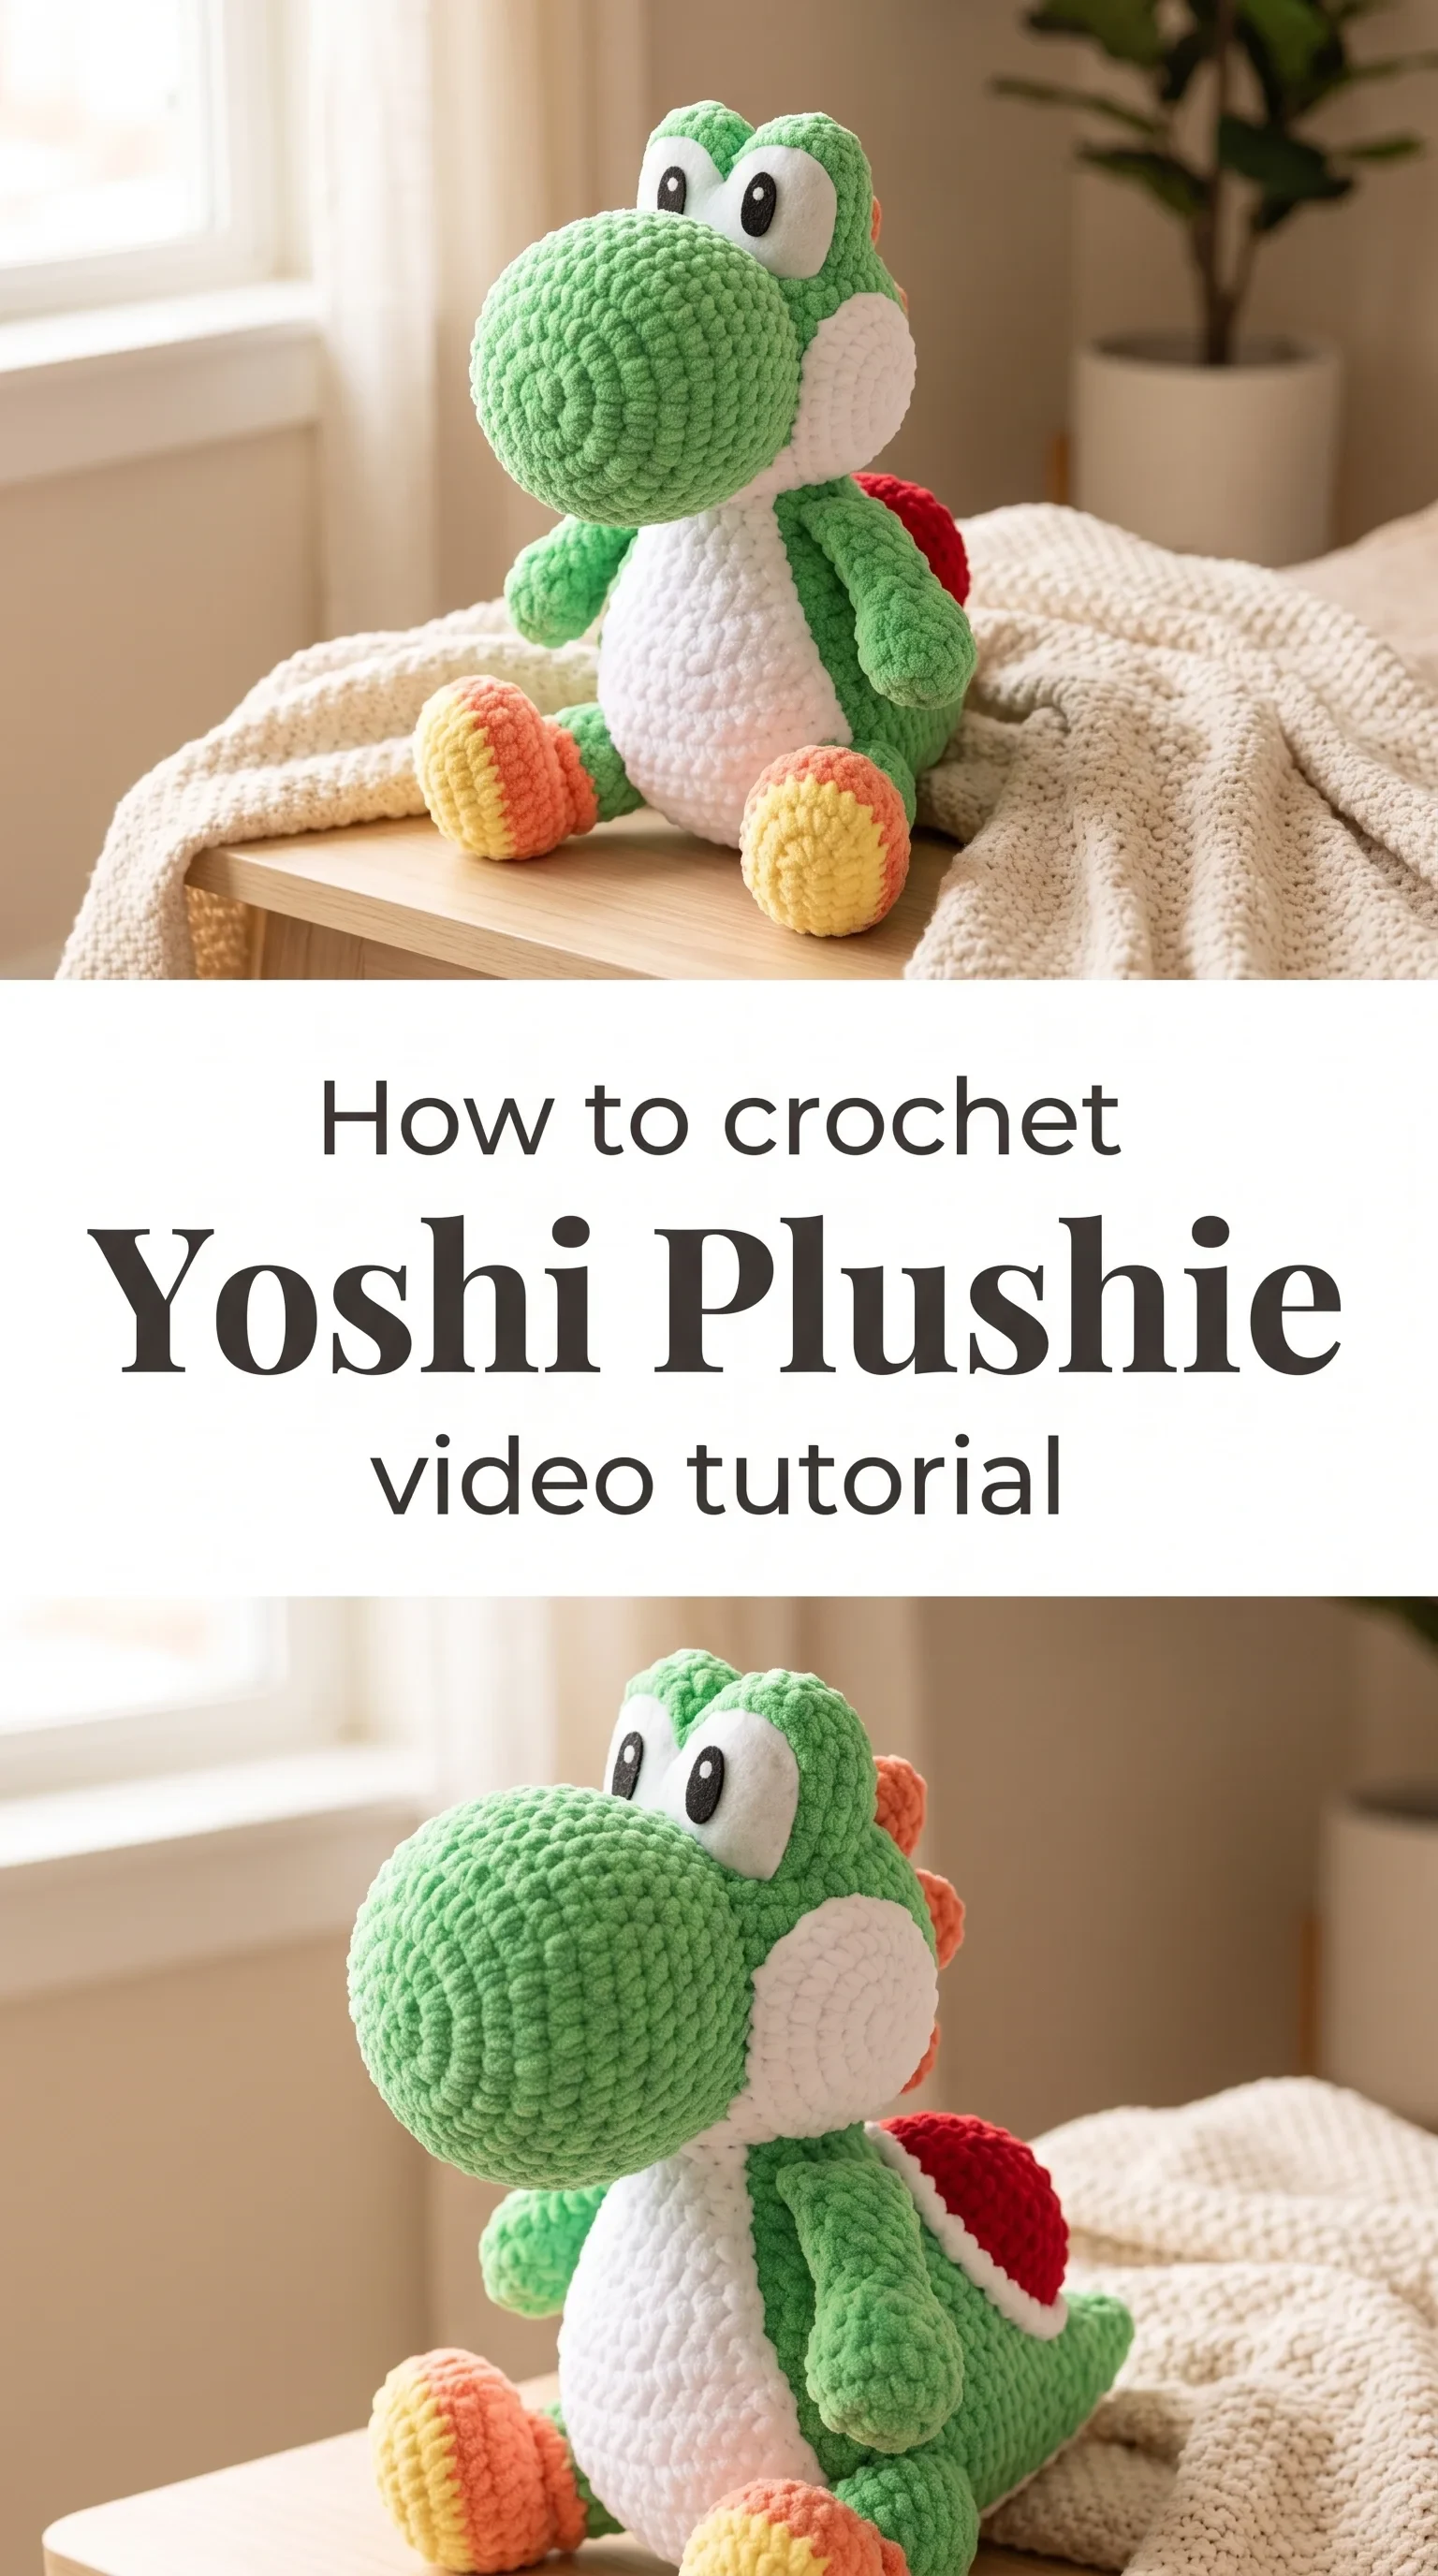
The Crochet Yoshi Plushie is one of those projects that carries the weight of pure, uncomplicated joy. Rooted in the world of Nintendo’s Super Mario franchise, Yoshi has been a beloved character since the early 1990s, and re-creating him in yarn feels like holding a small piece of that warmth in your hands. His rounded head, expressive button eyes, and chunky coral shoes make him instantly recognizable, while the crochet texture gives him a handmade softness that no mass-produced toy can replicate. This is a project for the gamer who crochets, the parent who wants something meaningful to gift, and anyone who simply loves a well-constructed amigurumi figure.
Yoshi Plushie Related Posts:
- Crochet Mini Bunny Plushie: An Adorable Handmade Friend
- Crochet Zodiac Mouse: A Charming Year of the Rat Keepsake
- Crochet Teddy Bear: A Timeless Handmade Treasure
- Crochet Amigurumi Birds: A Charming Miniature Collection
The classic colorway follows Yoshi’s signature bright green body with a white belly patch, black and white eyes, and those iconic orange and coral tipped shoes that are worked in a beautifully graduated palette. You can stay true to the original and work in green, or explore the full Yoshi universe with pink, yellow, blue, or red versions, each one just as expressive as the last. The color changes are clean and deliberate, which makes this project feel polished even at an intermediate level.
Materials and Tools
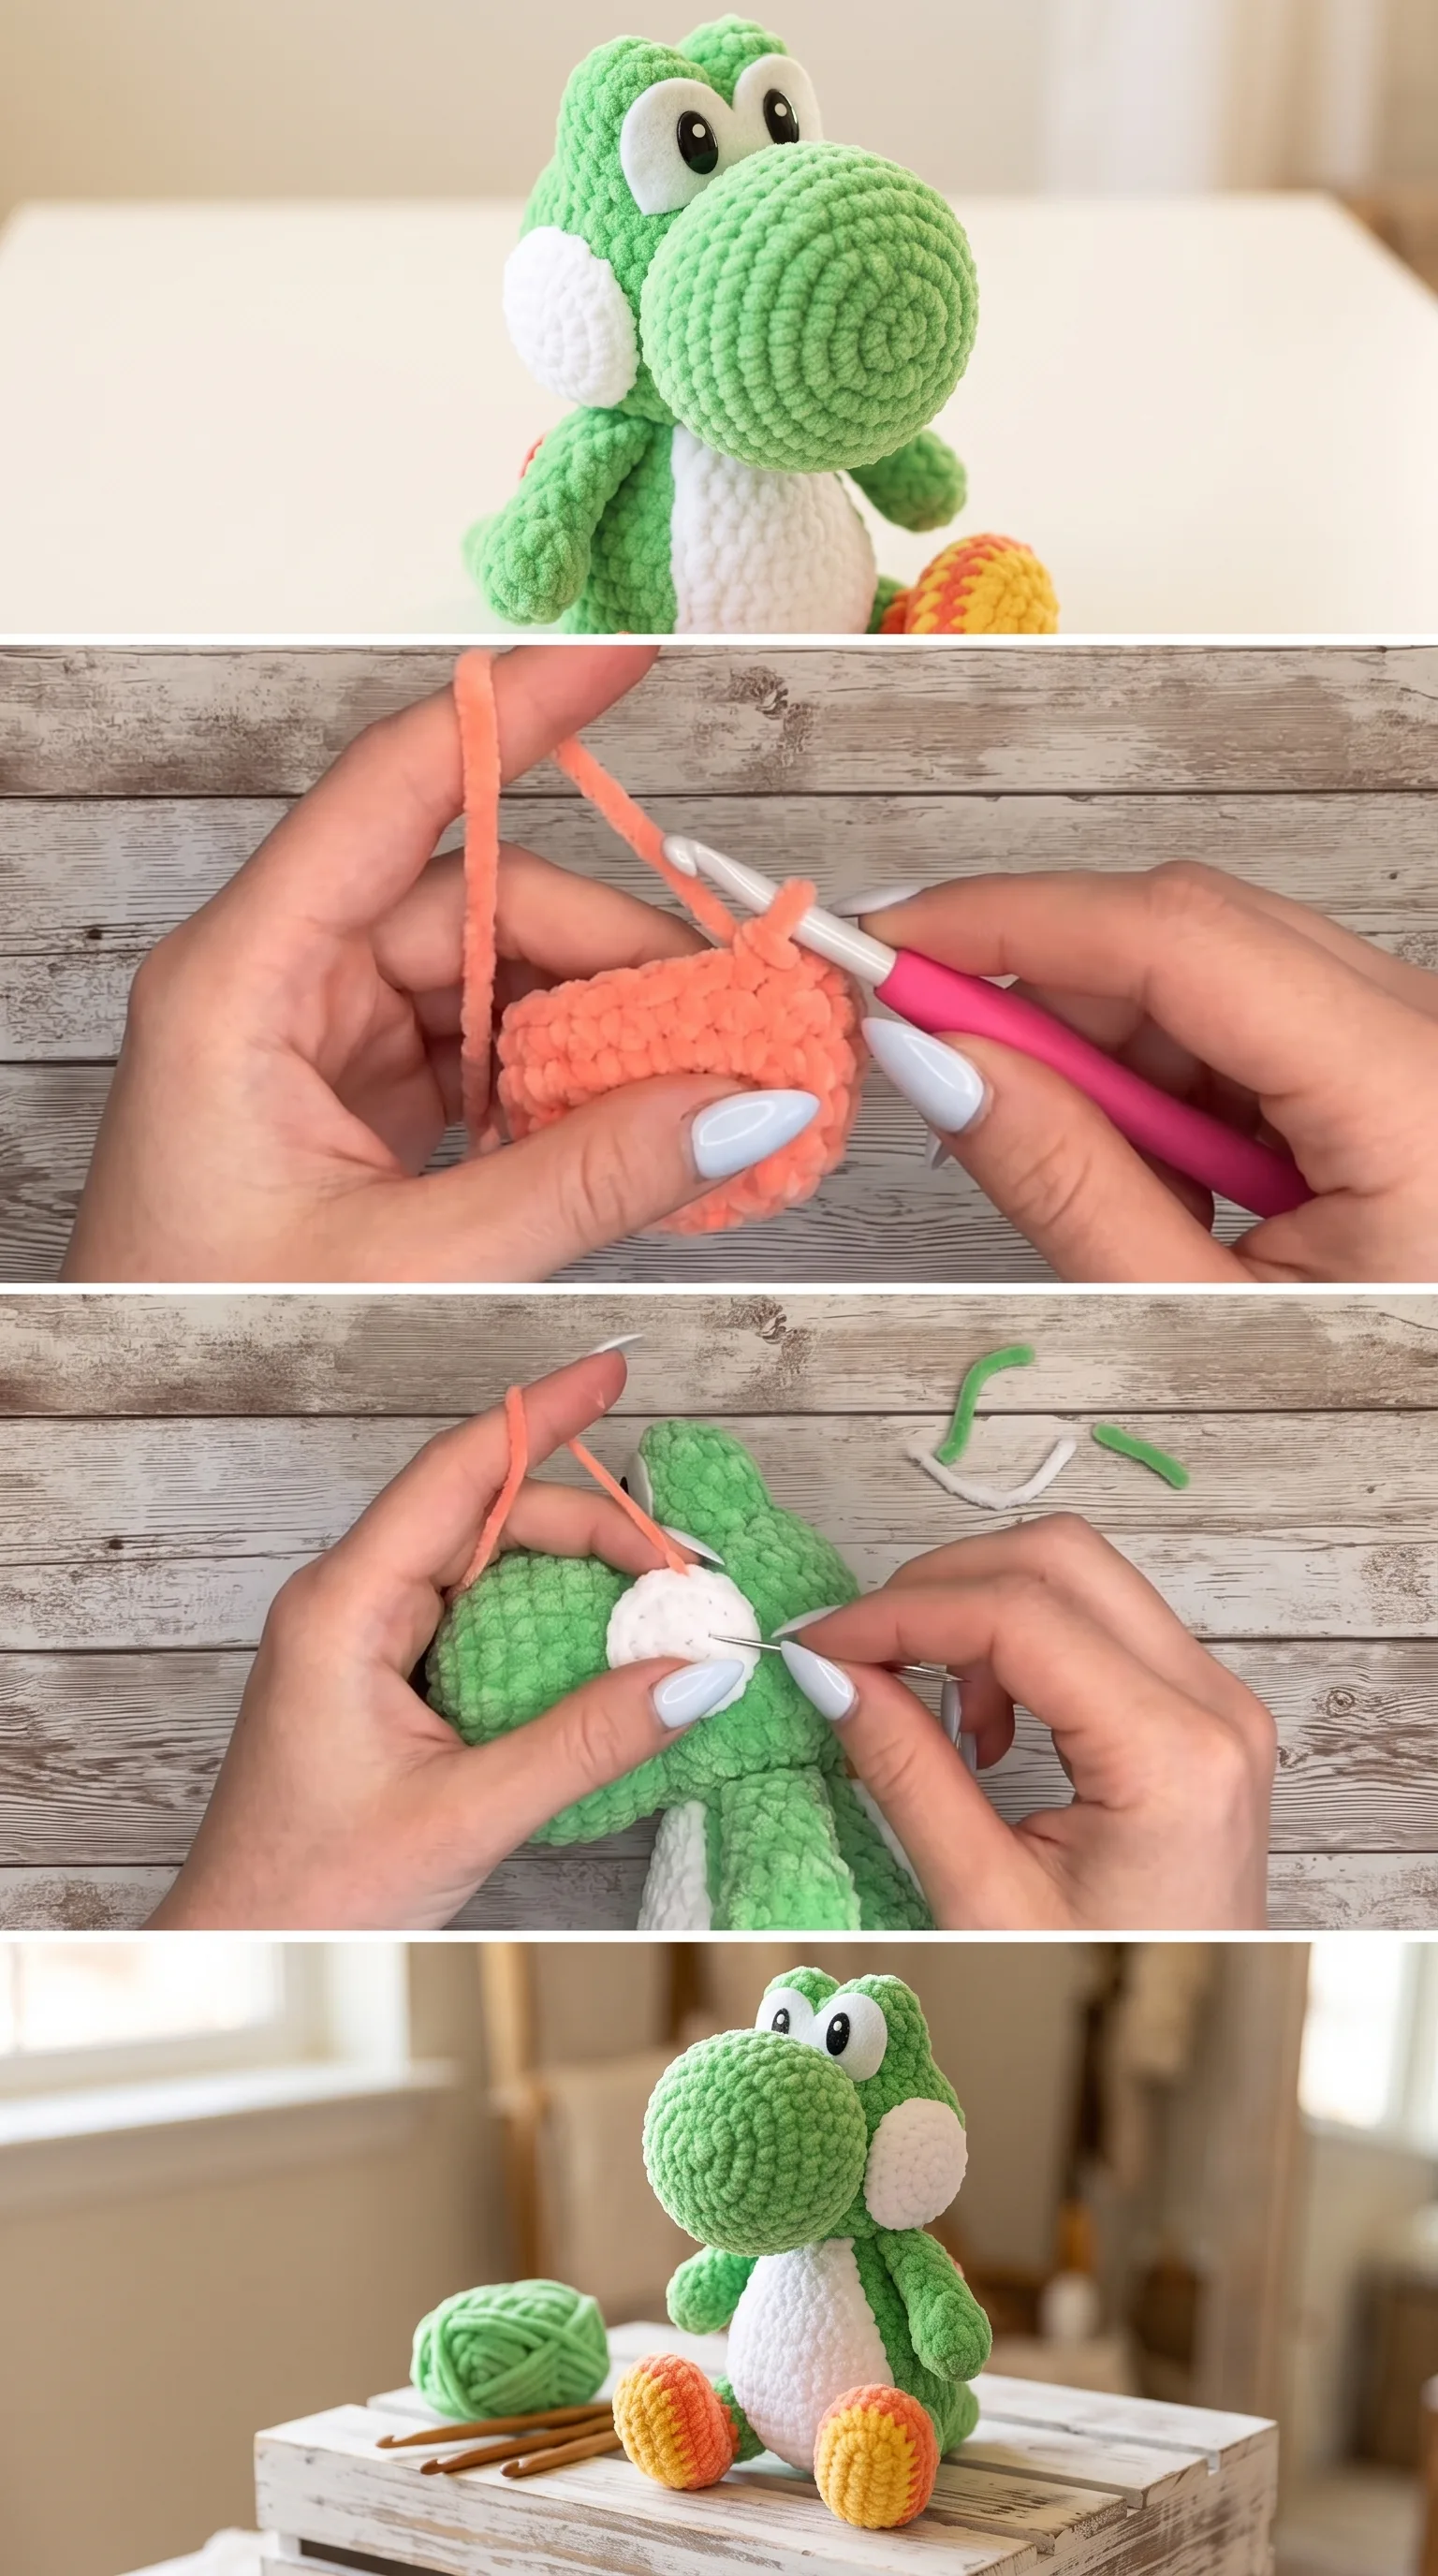
To make your Crochet Yoshi Plushie, you will want to work with a smooth worsted weight yarn that has minimal stretch, as the tight amigurumi-style construction benefits from a yarn that holds its shape firmly once stuffed. A cotton-acrylic blend or a high-quality acrylic like Lion Brand Pound of Love or Paintbox Simply DK in a heavier weight will give you that airy yet structured finish that makes the finished figure feel sturdy and hug-worthy. Use a 4mm crochet hook to create a fabric tight enough to prevent the polyfill stuffing from showing through the stitches. A blunt tapestry needle is essential for seaming the individual pieces together neatly, and a pair of safety eyes in 12mm and 18mm will give Yoshi that wide, characterful gaze.
Stitch by Stitch
This pattern works primarily in the round using a small but satisfying selection of stitches that build the body in clean, sculptural sections.
BULLET:SC (Single Crochet) The workhorse of amigurumi construction, SC creates the dense, even fabric that gives Yoshi his solid, well-defined shape throughout every body part.
BULLET:SC2tog (Single Crochet Two Together) This decrease stitch pulls two stitches into one and is used to shape Yoshi’s head, belly, and limbs as each section tapers and closes.
BULLET:INC (Invisible Increase) Worked by placing two SC into the same stitch, the increase expands each round outward to build the characteristic spherical fullness of Yoshi’s head and body.
BULLET:SL ST (Slip Stitch) Used at the close of certain rounds and during finishing, the slip stitch creates invisible joins that keep the fabric looking seamless from the outside.
Working entirely in the round creates a meditative rhythm that is especially satisfying with amigurumi, because each round brings the shape closer to completion in a way that feels almost hypnotic.
Construction
The Crochet Yoshi Plushie is built in separate pieces that are assembled at the end, which is a wonderfully forgiving construction method for beginners who want to take their time with each section. The head, body, legs, arms, shell, nose, and shoes are each worked individually in continuous rounds, stuffed firmly with polyfill as you go or just before closing, and then sewn together using your tapestry needle and matching yarn tails. Because every piece is self-contained, you can work on them in any order, which makes this project surprisingly portable and easy to pick up and put down between sessions. If you want to personalize your version, consider adding a tiny crocheted flower to the top of Yoshi’s head, which is a nod to the original game sprite and adds a charming finishing detail.
Wearing Your Yoshi Plushie
The finished Crochet Yoshi Plushie makes an exceptional display piece on a bookshelf or gaming desk, sitting upright with all his assembled pieces giving him a naturally proud, cheerful posture. He also works beautifully as a gift for children old enough to play with safety-eye toys, or as a collector’s piece for adult fans of the franchise. Finish him completely, photograph him in natural light next to your houseplants or your game console, and watch the compliments come in.
Keeping Your Yoshi Plushie Clean and Cuddly
Because this Crochet Yoshi Plushie is worked in acrylic or a cotton-acrylic blend, cleaning is straightforward and low stress. Hand washing in cool water with a gentle soap is the safest option, particularly if you have used safety eyes, which can sometimes loosen under heat. Gently squeeze out excess water without wringing the piece, reshape him carefully with your hands while damp, and lay him flat on a clean towel to air dry completely before displaying him again. Avoid placing him in direct sunlight for extended periods, as bright acrylic yarns can fade over time with prolonged UV exposure.
Every stitch you place into this project is a small act of care, and the finished figure carries that intention in every curve and seam. You made something that will be loved, displayed, and remembered. Find the full video tutorial by @crochetpinkpumpkin on YouTube, then share your finished Crochet Yoshi Plushie on Pinterest and tag it so other makers can find your beautiful work.
Follow us on Pinterest and subscribe to the Newsletter so you don’t miss a thing!
Tutorial and photos of this yoshi plushie by: Crochet Pink Pumpkin.