
This cozy checkerboard crochet cardigan features a stunning two-tone design in forest green and cream, with classic single crochet construction and ribbed finishing details. The cropped, boxy silhouette and wooden button closure make it perfect for layering. Here is the complete pattern to make your own.

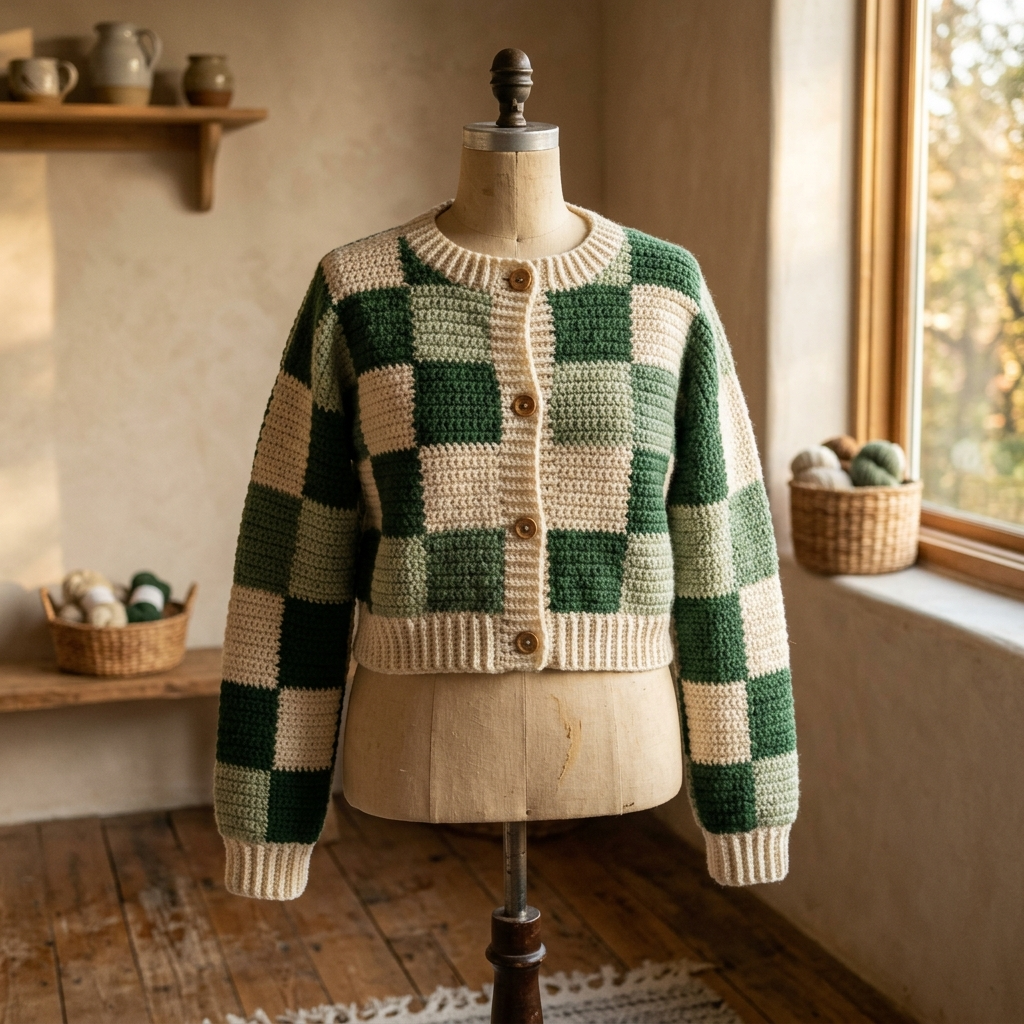
Materials
- Worsted weight yarn (4): approximately 600g total
– Color A (cream): 350g
– Color B (forest green): 250g
- 5.0mm crochet hook
- 5 wooden buttons (20mm)
- Yarn needle
- Stitch markers
Gauge
16 stitches x 18 rows = 4 inches in single crochet
Finished Measurements
Size Medium: Bust 42 inches, Length 20 inches, Sleeve length 18 inches
Adjust hook size up or down for different sizes.
Abbreviations
- ch: chain
- sc: single crochet
- sl st: slip stitch
- BLO: back loop only
- st(s): stitch(es)
Pattern Notes
The cardigan body is worked flat in separate panels, then seamed. Each checkerboard square measures approximately 3 inches. Color changes happen at row ends for clean transitions.
Back Panel
Foundation: With Color A, ch 67.
Row 1: Sc in 2nd ch from hook and across. (66 sc)
Rows 2 to 12: Ch 1, turn, sc across in Color A.
Row 13: Begin checkerboard. Work 11 sc in Color A, 11 sc in Color B, 11 sc in Color A, 11 sc in Color B, 11 sc in Color A, 11 sc in Color B.
Rows 14 to 24: Continue pattern, keeping colors aligned vertically.
Row 25: Shift pattern. Work 11 sc in Color B, 11 sc in Color A, 11 sc in Color B, 11 sc in Color A, 11 sc in Color B, 11 sc in Color A.
Rows 26 to 36: Continue shifted pattern.
Rows 37 to 48: Repeat Rows 13 to 24.
Rows 49 to 60: Repeat Rows 25 to 36.
Rows 61 to 72: Work in Color A only for upper back.
Fasten off.
Left Front Panel
Foundation: With Color A, ch 34.
Row 1: Sc in 2nd ch from hook and across. (33 sc)
Rows 2 to 12: Ch 1, turn, sc across in Color A.
Row 13: Work 11 sc in Color A, 11 sc in Color B, 11 sc in Color A.
Rows 14 to 24: Continue pattern.
Row 25: Work 11 sc in Color B, 11 sc in Color A, 11 sc in Color B.
Rows 26 to 36: Continue shifted pattern.
Rows 37 to 48: Repeat Rows 13 to 24.
Rows 49 to 60: Repeat Rows 25 to 36.
Rows 61 to 66: Work in Color A only.
Neckline shaping (Row 67): Ch 1, turn, sc in first 22 sts. Leave remaining sts unworked.
Rows 68 to 72: Decrease 1 st at neck edge each row. (17 sc remain)
Fasten off.
Right Front Panel
Work as Left Front, reversing neckline shaping.
Sleeves (Make 2)
Foundation: With Color A, ch 39.
Row 1: Sc in 2nd ch from hook and across. (38 sc)
Rows 2 to 8: Ch 1, turn, sc across in Color A.
Row 9: Work 9 sc in Color A, 10 sc in Color B, 10 sc in Color A, 9 sc in Color B.
Rows 10 to 20: Continue pattern.
Row 21: Work 9 sc in Color B, 10 sc in Color A, 10 sc in Color B, 9 sc in Color A.
Rows 22 to 32: Continue shifted pattern.
Rows 33 to 44: Repeat Rows 9 to 20.
Rows 45 to 56: Repeat Rows 21 to 32.
Rows 57 to 64: Work in Color A, increasing 1 st each edge every other row. (46 sc)
Fasten off.
Ribbing
Bottom Band
With Color A, ch 9.
Row 1: Sc in 2nd ch from hook and across. (8 sc)
Row 2: Ch 1, turn, sc BLO across.
Repeat Row 2 until band stretches across entire bottom edge (approximately 130 rows).
Fasten off and sew to bottom of joined body.
Cuffs (Make 2)
With Color A, ch 7.
Row 1: Sc in 2nd ch from hook and across. (6 sc)
Row 2: Ch 1, turn, sc BLO across.
Repeat Row 2 for approximately 38 rows.
Fasten off and sew into a tube. Attach to sleeve end.
Neckband
With Color A, ch 7.
Work as cuffs until band fits around entire neckline and both front edges (approximately 180 rows).
Assembly
- Block all pieces to measurements.
- Seam shoulders using mattress stitch.
- Attach sleeves to armholes, centering sleeve cap at shoulder seam.
- Sew side seams and sleeve seams in one continuous line.
- Attach bottom ribbing band.
- Attach neckband, starting at bottom right front, going up around neck, and down left front.
Button Band
The neckband doubles as the button band. Mark 5 evenly spaced button positions on the right front band. Sew buttons in place.
For buttonholes on left front: when crocheting the neckband, at each button position, ch 2 and skip 2 stitches to create openings.
Tips for Clean Checkerboard
- Carry unused color loosely along the wrong side when switching.
- For neater color changes, complete the last yarn over of each stitch with the new color.
- Block aggressively. The checkerboard pattern looks crispest after wet blocking.
- Use stitch markers at color change points to keep squares aligned.
Customization Ideas
Swap the forest green for rust, navy, or mustard for a different seasonal vibe. Add pockets by crocheting two 4×4 inch squares and sewing them to the fronts. For a longer cardigan, add two more rows of checkerboard squares to the body before the solid upper section.
This checkerboard cardigan works up faster than it looks thanks to the simple single crochet construction. The visual interest comes from strategic color placement rather than complicated stitches. Grab your hook and start your first square tonight.