
The Crochet Tulip Stitch is the answer when you need a floral detail that feels genuinely handcrafted rather than decorative for decoration’s sake. In this article, you will discover the materials, techniques, and styling ideas that make this stitch one of the most rewarding three-dimensional textures in a crocheter’s collection.

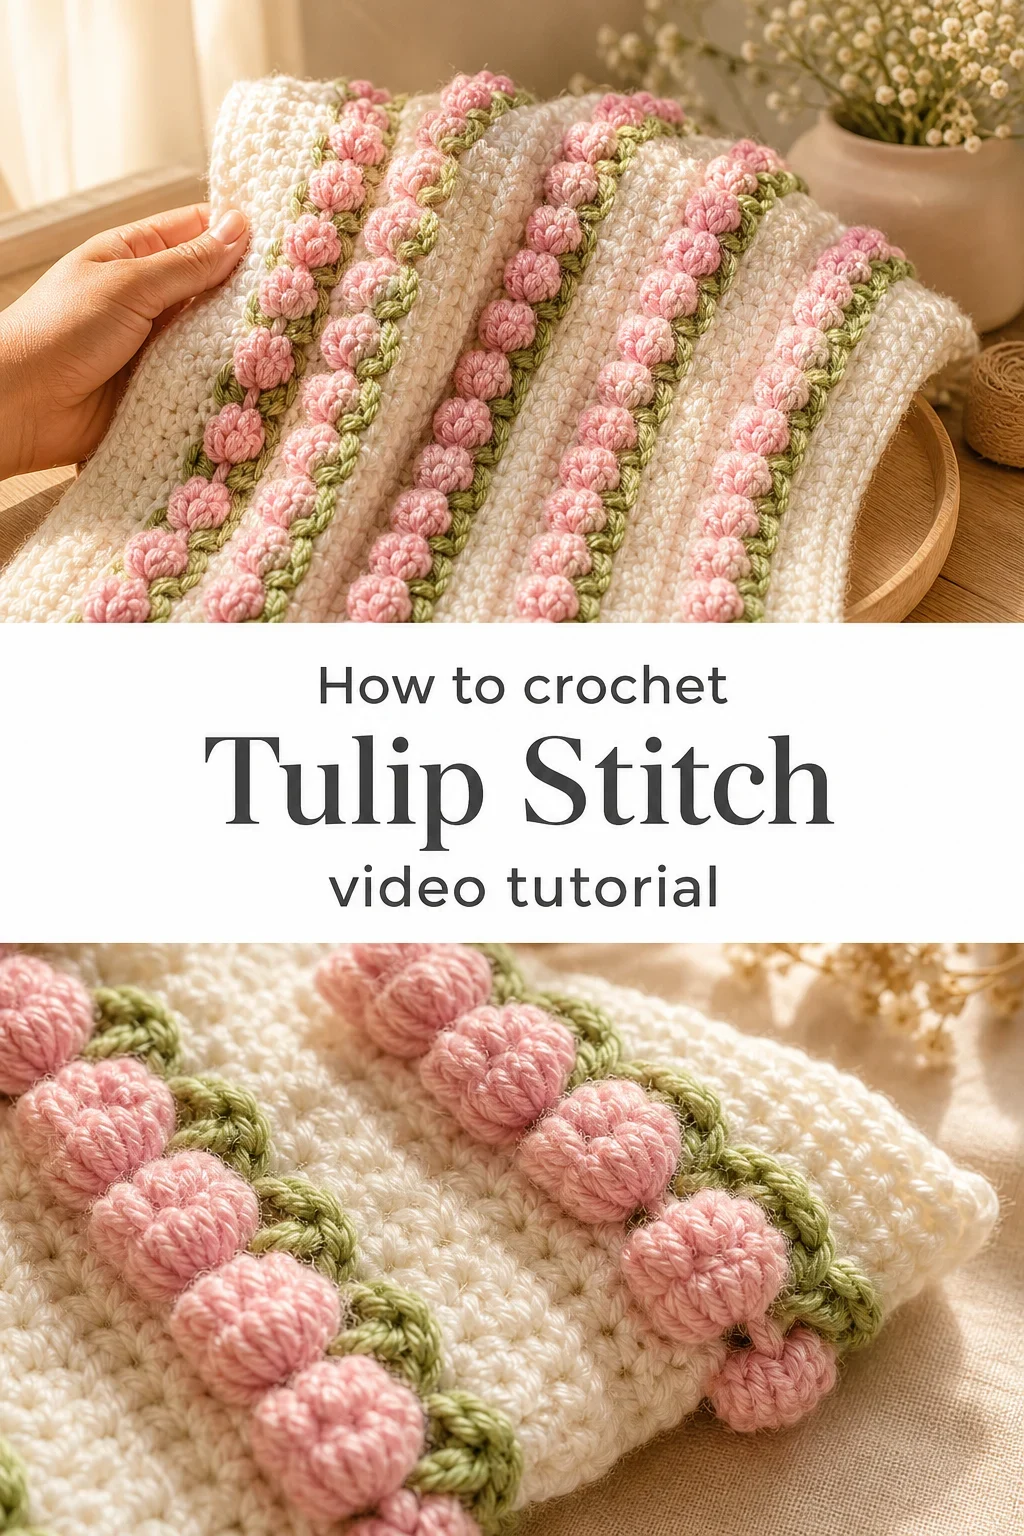
The Tulip Stitch
The Crochet Tulip Stitch carries the kind of quiet beauty that makes people stop and ask, “Did you really make that?” Each individual tulip bloom sits proud against a background of tight, even stitches, creating a surface that is airy yet structured, soft to the touch but visually bold. It is a stitch for the maker who loves texture, who finds satisfaction in watching a flat row of white yarn suddenly burst into pink dimensional blooms. Whether you are a beginner finding your confidence or an intermediate crocheter looking for something worth lingering over, this pattern meets you exactly where you are.
Tulip Stitch Related Posts:
- Crochet Mollie Flower: A Delicate Dimensional Bloom
- Crochet Rose Embellishment: A Delicate Floral Accent
- Crochet Daisy Flower: A Charming Floral Accent
- Crochet 3D Roses: A Beautiful Dimensional Bloom
The color palette shown in the reference images is genuinely dreamy: soft white as the base, warm rose pink for the tulip clusters, and a muted sage green that traces the stems and grounds each bloom with a botanical realness. You could just as easily work the Crochet Tulip Stitch in cream and dusty lavender for a vintage mood, or in ivory and coral for something that feels like a summer market. The three-color rhythm is part of what makes this pattern so visually satisfying, and swapping those colors is the easiest way to make it entirely your own.
Materials and Tools
The reference images show this stitch worked in what appears to be a sport weight or light DK yarn, and that choice is intentional. A finer yarn allows each tulip bobble to resolve into a clean, rounded shape without becoming bulky or stiff. Cotton or cotton-blend yarn is especially lovely here because it holds the three-dimensional structure of each bloom firmly while remaining soft against skin. The hook shown in the first image is a 2.0mm hook, which produces that precise, dense fabric you can see in the finished swatch, though if you prefer a slightly drapier result you might move up to a 2.5mm hook and swatch to compare.
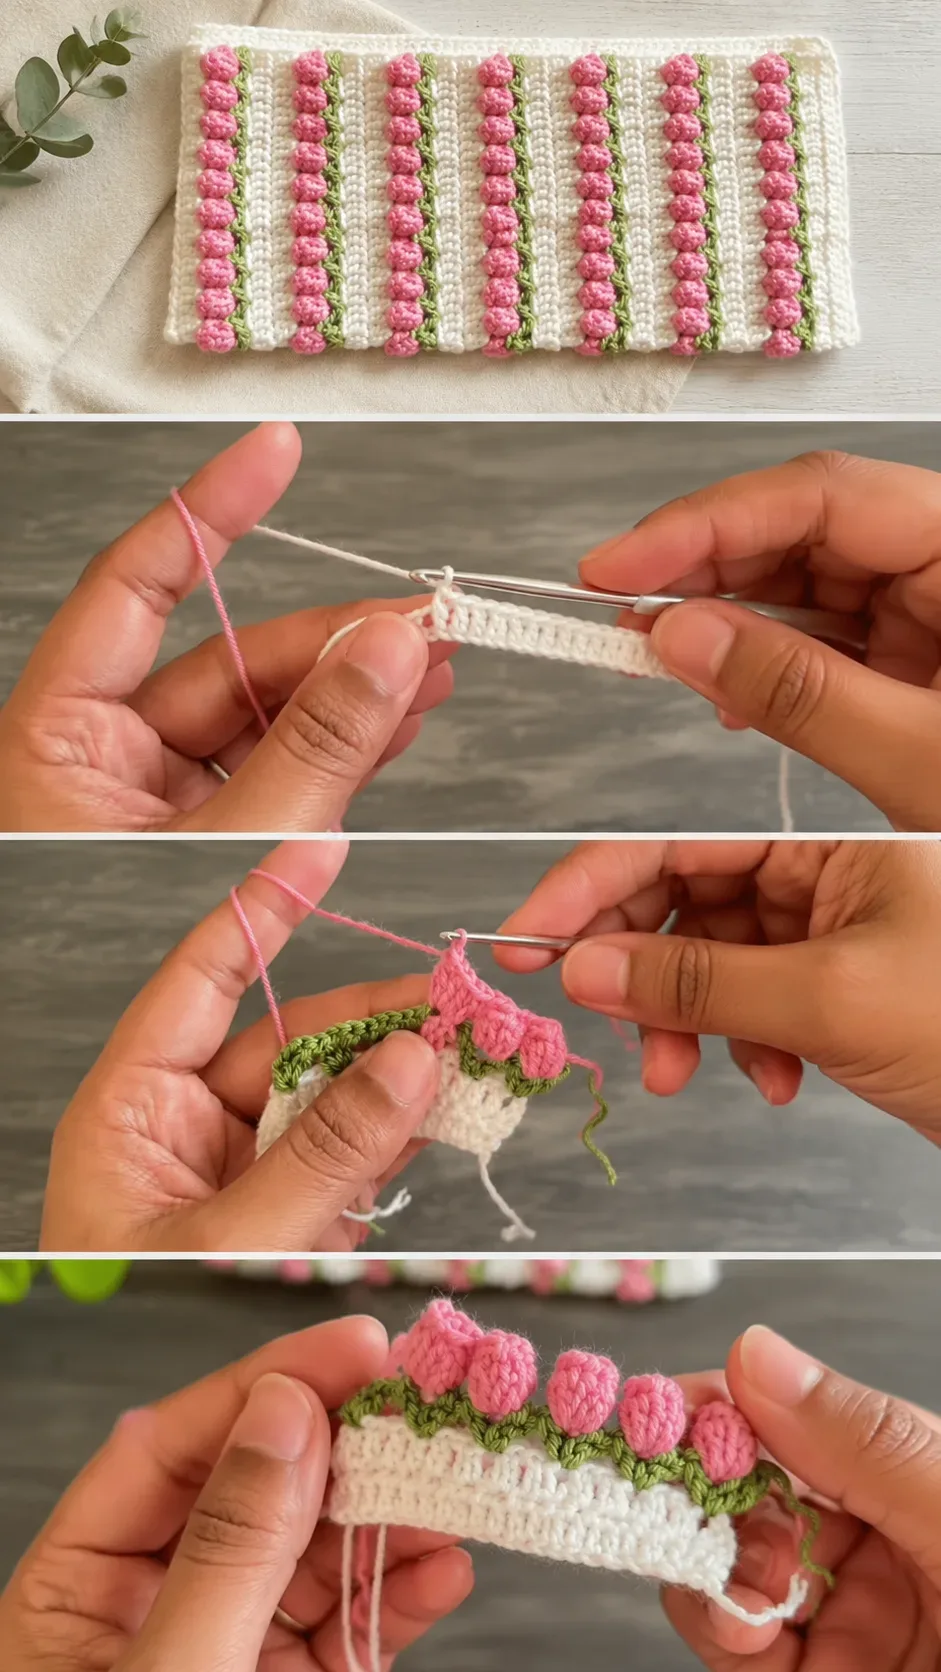
Stitch by Stitch
The Crochet Tulip Stitch draws on a small, elegant vocabulary of crochet techniques.
BULLET:SC (Single Crochet) The foundation fabric between tulip columns is built almost entirely in SC, creating a firm and even background that lets the blooms read clearly.
BULLET:DC (Double Crochet) Individual DC stitches are clustered together to form the rounded body of each tulip, building height and dimension with each YO.
BULLET:YO (Yarn Over) The YO motion is repeated multiple times within a single tulip formation, which is precisely what creates that gathered, petal-like fullness.
BULLET:Bobble or Cluster Stitch Each tulip head is essentially a closed bobble cluster, where several incomplete DC stitches share a single closing pull-through, locking the bloom into shape.
Once you settle into the alternating rhythm of the background SC rows and the tulip cluster rows, the whole piece begins to feel meditative, the kind of counting that quiets the mind rather than taxing it.
Construction
The swatch shown in the images is worked flat in rows, making it ideal for panels that can later be seamed into bags, cushion covers, book sleeves, or cuffs. The tulip columns run vertically, which means you work your foundation chain first, then build row by row with color changes introduced at the beginning of each designated tulip row. For beginners, working in a small, defined swatch first is a wonderful way to understand where each color enters and exits before committing to a larger project. If you want to scale the pattern up or adjust the column spacing, the video tutorial walks you through exactly how the repeat is structured so you can customise confidently.
Wearing Your Tulip Stitch
A finished panel worked in the Crochet Tulip Stitch makes a genuinely beautiful cuff or wristlet, soft enough to wear against bare skin and structured enough to hold its shape across a long day. You could also use a completed panel as the front face of a small clutch bag, letting the pink blooms face outward against a linen lining, or sew two panels together to create a padded tablet sleeve that feels like a gift even before it is given. Finishing a project in this stitch produces something that looks far more complex than the making of it, which is always a deeply satisfying feeling.
Keeping Your Tulip Stitch Work Looking Fresh
Because the three-dimensional bobbles can flatten with rough handling, it is worth wet blocking your finished piece gently rather than steaming it. Lay the work flat on a blocking mat, ease each tulip cluster back into shape with your fingertips, and allow it to air dry completely before moving it. If you used a cotton or cotton-blend yarn, a cool machine wash on a delicate cycle is generally safe, but always check your yarn label before committing. Store finished pieces flat or loosely rolled rather than folded at the tulip rows, which helps the blooms retain their rounded shape over time.
You made something with your hands that carries real beauty in every stitch, and that is worth celebrating every single time. If you loved making the Crochet Tulip Stitch, save this article to your Pinterest boards and share your finished work so other makers can find their way to this pattern too.
Follow us on Pinterest and subscribe to the Newsletter so you don’t miss a thing!
Tutorial and photos of this tulip stitch by: Beyond Diary.