
When your walls feel too plain and your shelves too quiet, the Crochet Sun Granny Square is the handmade solution that brings warmth, colour, and personality back into your space. In this article, you will discover the materials, stitches, construction approach, and care tips you need to make this radiant square your own.
The Sun Granny Square
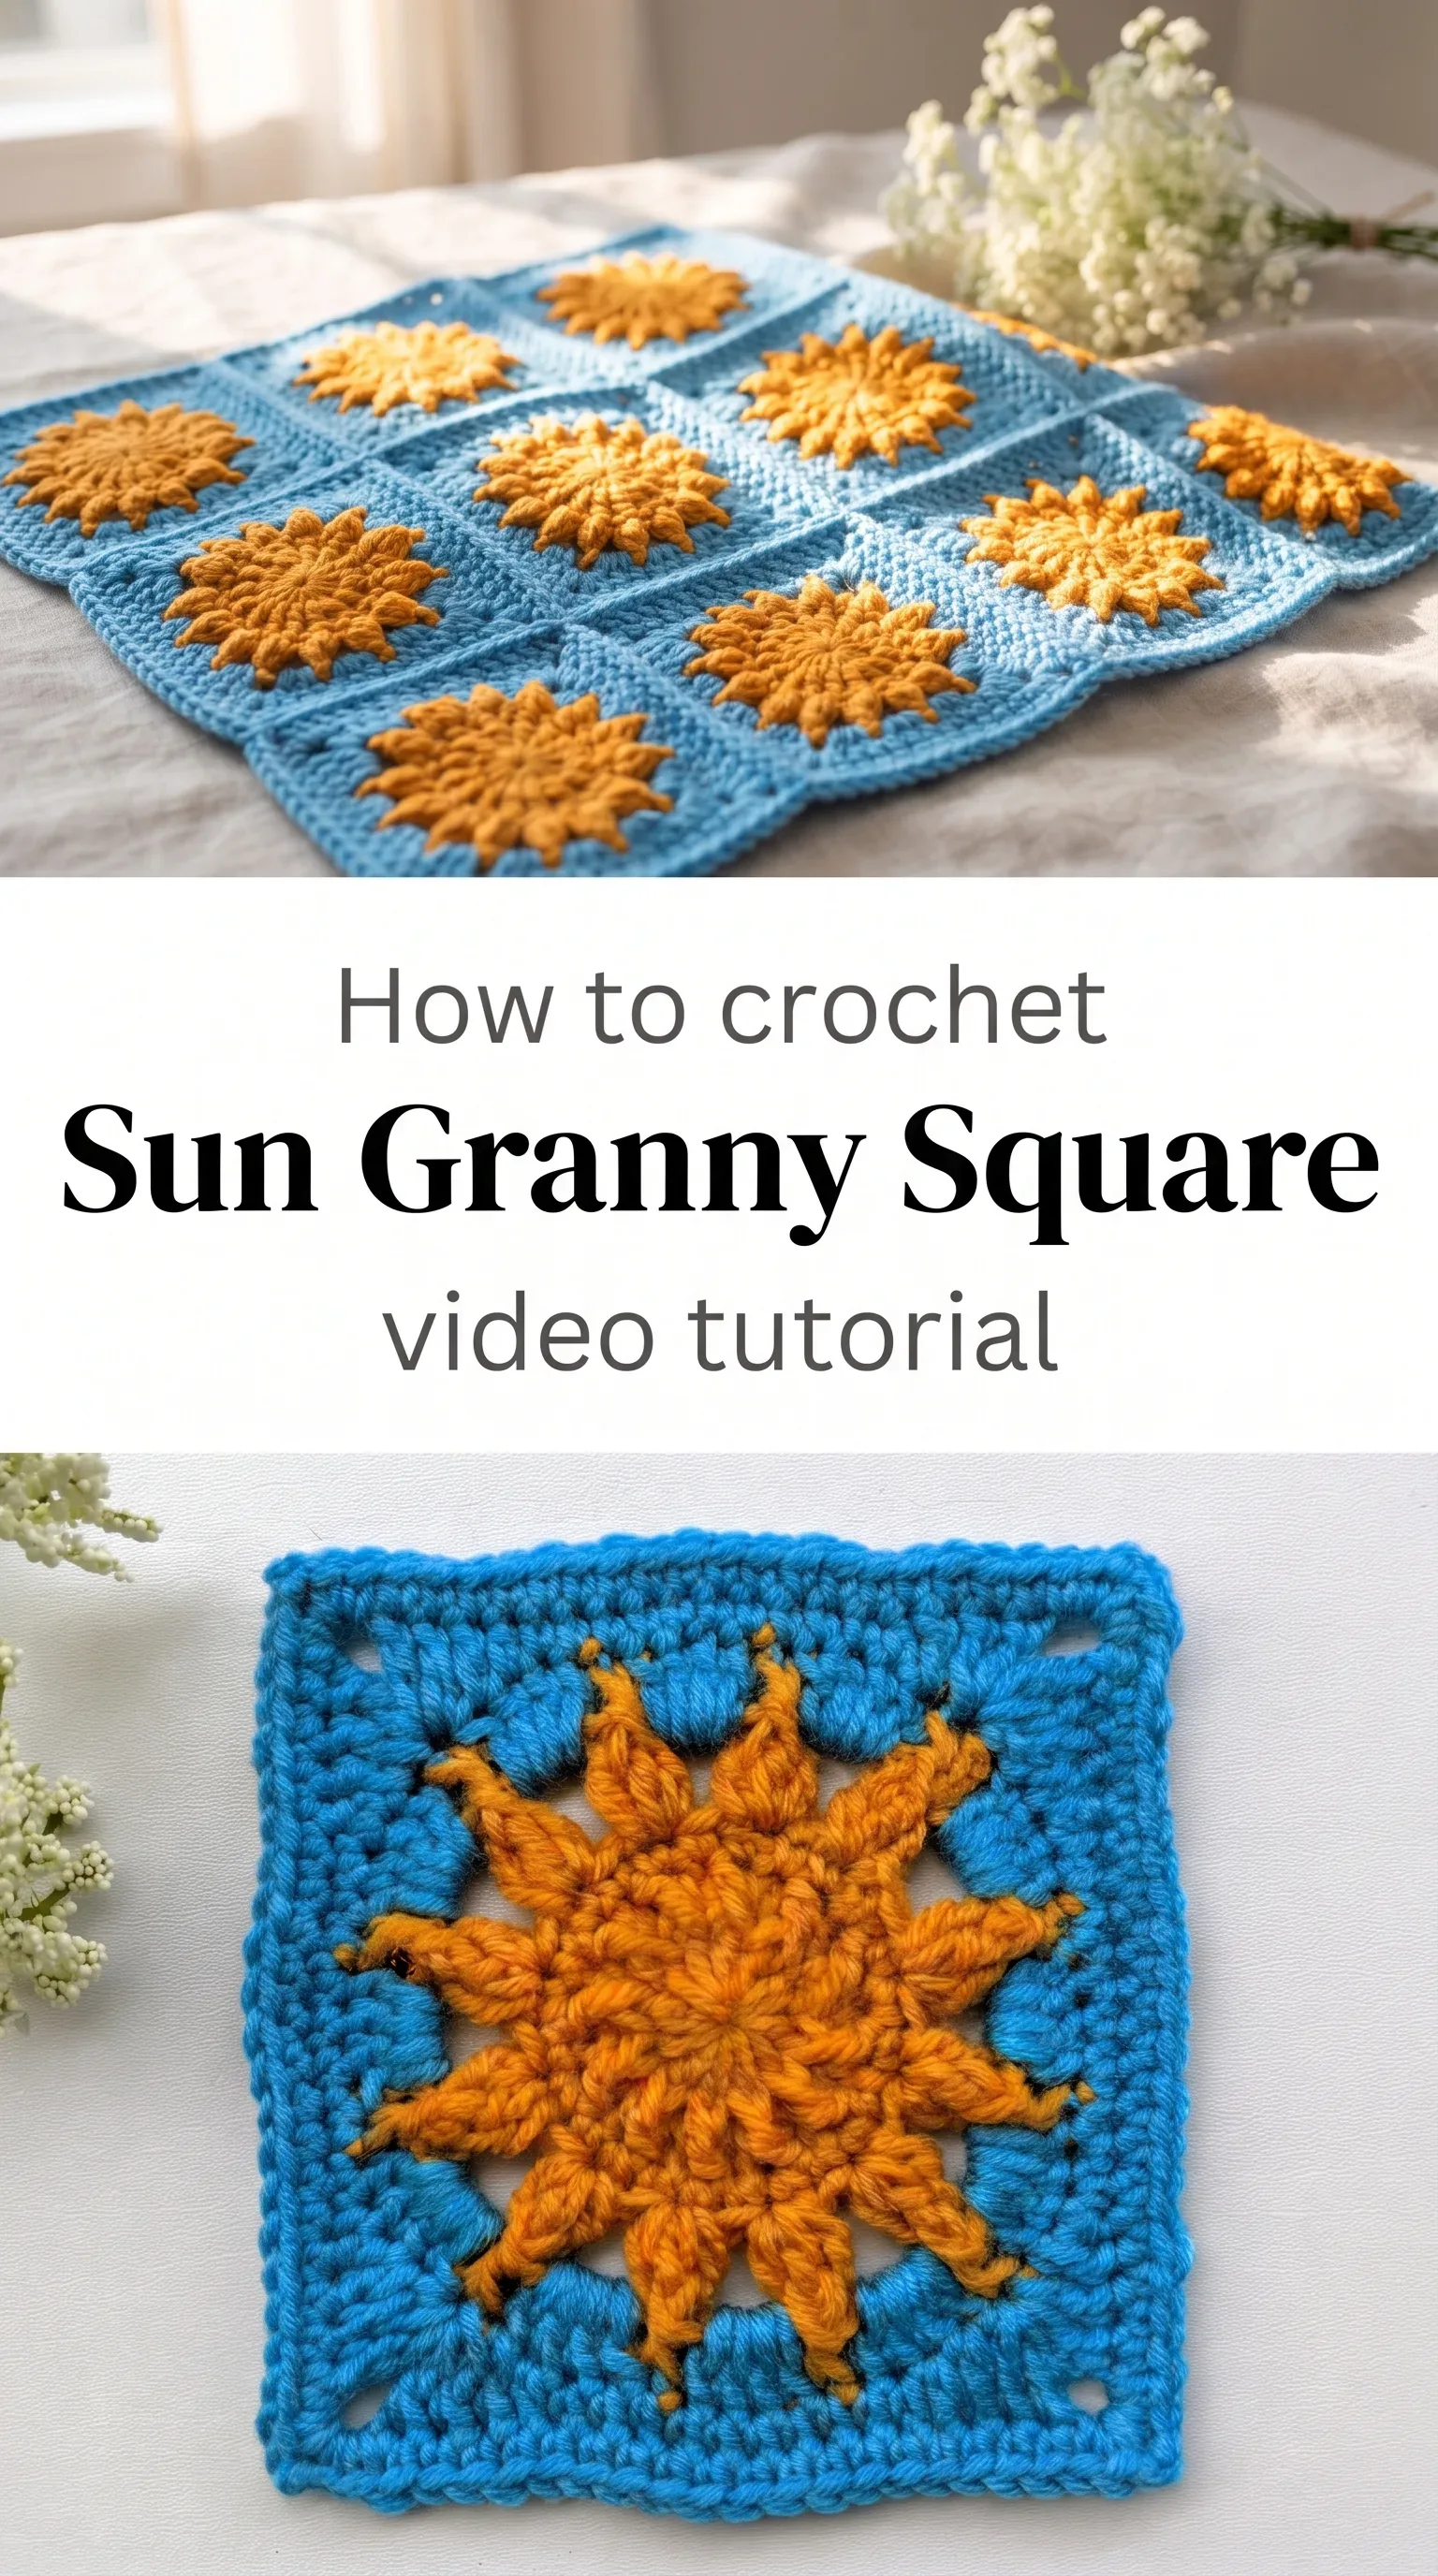
The Crochet Sun Granny Square is the kind of project that stops people mid-scroll and makes them reach instinctively for their hook. At its centre blooms a golden, flame-edged sun worked in rich amber or mustard yarn, its rays spreading outward in an airy yet structured burst that feels almost sculptural against the flat blue background. The contrast between the warm golden motif and the cool sky-blue border creates something that reads as both playful and sophisticated, the sort of piece you could display in a child’s nursery or a Scandinavian-style living room with equal confidence. This square is welcoming for intermediate beginners who are comfortable working in the round and are ready to try something with a little more character.
Granny Square Related Posts:
- Crochet Puff Stitch Chickens: A Charming Decorative Accent
- Crochet Granny Square Joining: A Seamless Connection Guide
- Crochet Floral Motif Runner: A Delicate Versatile Design
- Crochet Lace Edged Coaster: A Delicate Table Accent
The classic pairing shown in the reference images, golden amber against bright sky blue, is nothing short of cheerful and timeless. But this square takes colour beautifully in any direction: think burnt orange against cream for an autumnal mood, coral against sage green for a botanical feel, or sunny yellow against navy for something bold and graphic. The colour you choose will completely reshape the personality of the finished piece, which makes this an endlessly repeatable pattern.
Materials and Tools
For the Crochet Sun Granny Square, you will want to work with a smooth worsted weight yarn that has just enough structure to hold the raised rays of the sun motif without collapsing. A cotton-acrylic blend works wonderfully here, giving you the crispness of cotton with the softness and resilience of acrylic, and it photographs beautifully for those flat-lay shots. A 4mm crochet hook is the sweet spot for this weight, giving you a fabric that is firm enough to show off the texture without pulling too tight. Keep a yarn needle nearby for weaving in your ends neatly between the two colours, because colour changes are a key part of the construction and clean finishing will make the square look truly polished.
Stitch by Stitch
The Crochet Sun Granny Square draws on a small but satisfying vocabulary of stitches that layer together to create its textured, dimensional look.
BULLET:SC (Single Crochet) The foundational stitch used to anchor rounds and create the neat, tight border along the outer edge of the square.
BULLET:DC (Double Crochet) The workhorse of the blue border section, forming the solid, even clusters that give the granny square its classic structured frame.
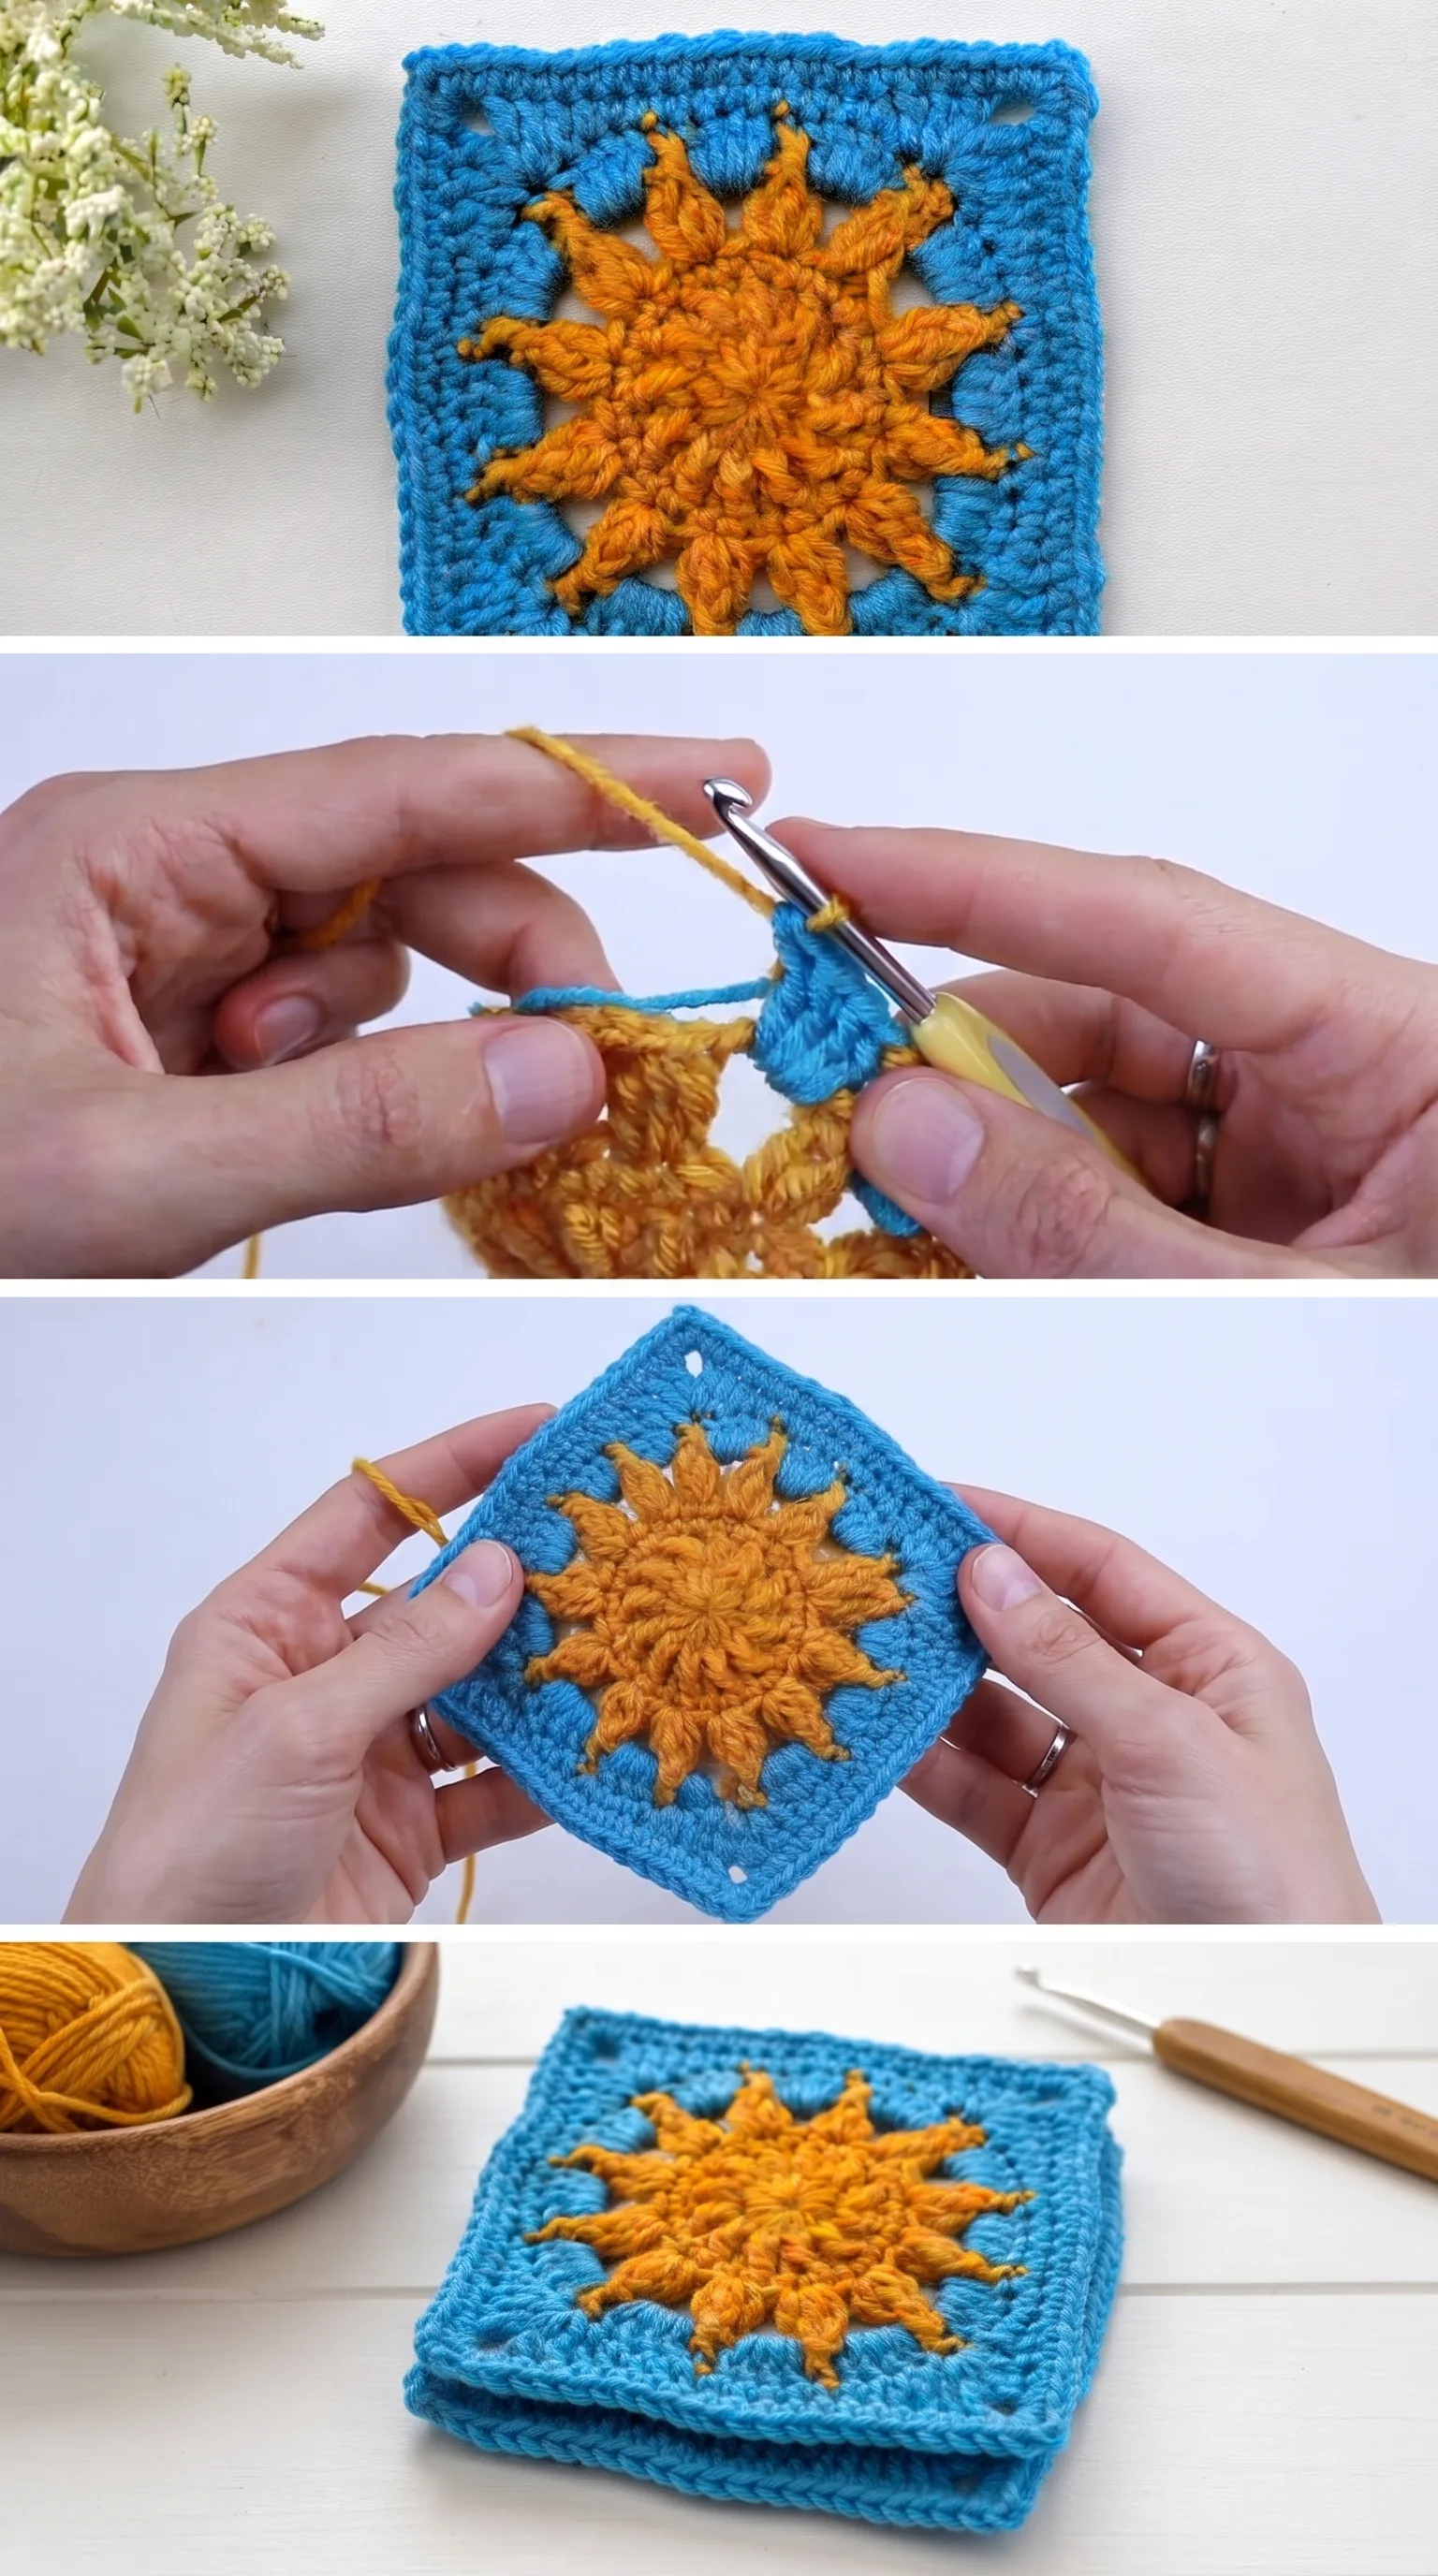
BULLET:Spike Stitch A dramatic elongated stitch worked into lower rounds that creates the pointed, flame-like rays of the sun motif and gives the square its signature texture.
BULLET:YO (Yarn Over) Used repeatedly within the spike and cluster constructions to build height and the puffed, rounded quality of the sun’s body.
Once you fall into the meditative rhythm of building those golden rays round by round, the colour change that introduces the blue border feels like a reward, a breath of cool air after something warm and focused.
Construction
The Crochet Sun Granny Square is worked entirely in the round, beginning at the centre of the sun and spiralling outward through several rounds of golden yarn before the blue border is introduced. The sun motif is built up using spike stitches that reach back into earlier rounds, pulling upward to mimic the wild, reaching quality of actual sunrays, and this technique is what gives the square its three-dimensional presence. The full step-by-step construction is covered in the video tutorial, which walks you through every round with clear close-up guidance, so you can follow along even if spike stitches are new to you. If you want to personalise your square, try working the border in two rounds of contrasting colours rather than a single solid shade, which creates a lovely layered frame effect.
Wearing Your Sun Granny Square
A single finished Crochet Sun Granny Square is a complete decorative object on its own: frame it in an embroidery hoop for wall art, use it as a mug rug or coaster on a coffee table, or stitch it onto the front of a tote bag for an instant handmade accent. Join multiples together and you have the beginning of a throw blanket, a cushion cover, or even a lightweight summer wall hanging that brings the feeling of golden hour indoors. Finishing even one square will make you want to cast on another immediately.
Keeping Your Sun Granny Square Looking Its Best
Once your Crochet Sun Granny Square is complete, a light wet block will settle the stitches, smooth the border, and coax those sun rays into their most defined and even shape. Pin the square onto a foam blocking board while it is damp, easing the corners out gently and letting it dry completely flat before removing the pins. For washing, treat it as you would any hand-crocheted piece: a cool hand wash with a gentle wool wash or delicate detergent, squeezed softly without wringing, and laid flat to dry. Store finished squares flat or loosely rolled, never folded at the centre, to keep the raised sun motif from being crushed over time.
Every Crochet Sun Granny Square you finish is a small, handmade thing that carries real light into whatever room it enters, and that is worth celebrating. Save this to your Pinterest boards and share your finished square so other makers can find their own little burst of sunshine.
Follow us on Pinterest and subscribe to the Newsletter so you don’t miss a thing!
Tutorial and photos of this sun granny square by: Crochet Bits.