
The Crochet Honeycomb Scarf is the perfect solution for anyone who wants an accessory that feels as beautiful as it looks, with three-dimensional texture that sets it apart from anything you could find in a shop. In this article, you will discover the materials, stitches, and creative possibilities that make this piece one worth starting this very week.
The Honeycomb Scarf
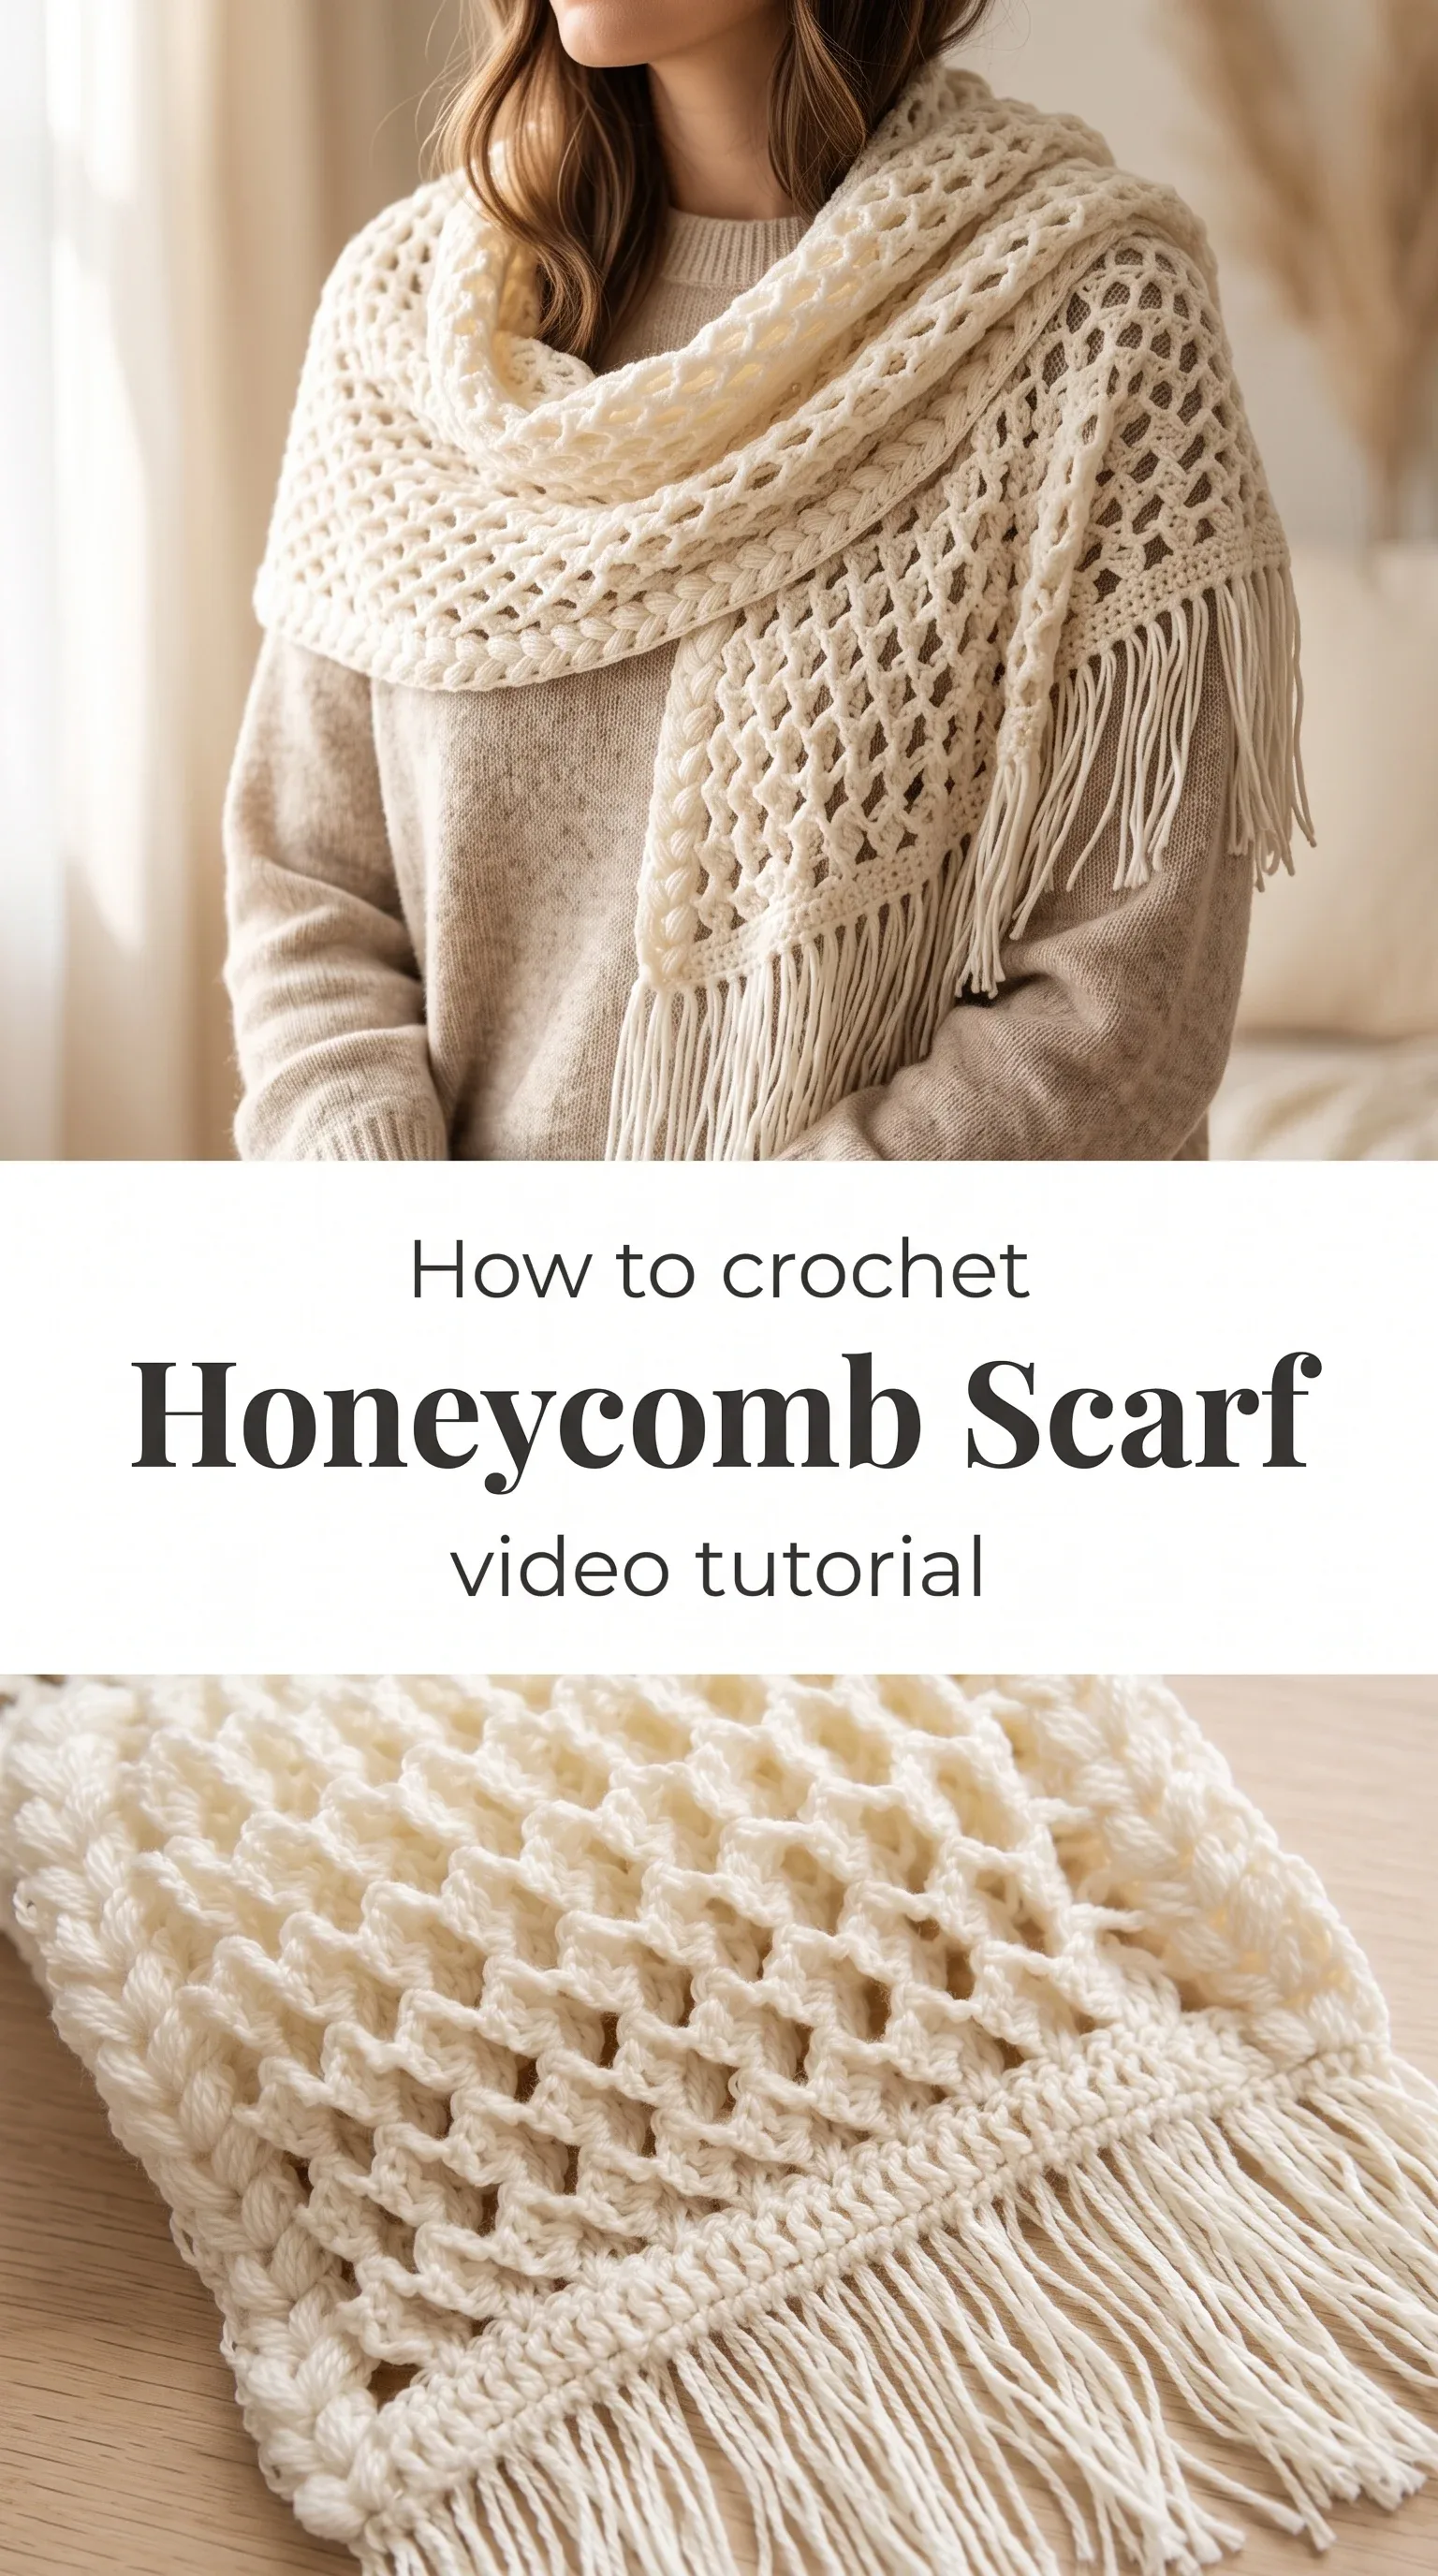
The Crochet Honeycomb Scarf is one of those pieces that stops people mid-conversation, prompting the inevitable question: did you make that yourself? Its raised, cellular texture creates a surface that is airy yet structured, light enough to drape softly around the shoulders while holding a satisfying three-dimensional form that catches the light with every fold. The repeated honeycomb cells form an almost architectural pattern across the fabric, finished along the lower edge with a cascade of long, silky fringe that adds movement and a whisper of elegance to every wear. This scarf is made for the person who loves handmade things with soul, the kind of piece passed between hands and admired slowly.
Honeycomb Scarf Related Posts:
- Crochet Shoulder Bag: A Charming Everyday Accessory
- Crochet Diamond Tote Bag: A Timeless Everyday Companion
- Crochet Market Tote: A Practical Everyday Essential
- Crochet Zippered Pouch: A Practical Everyday Essential
Worked in a soft cream or ivory, the Crochet Honeycomb Scarf takes on an heirloom quality that feels at home draped over a linen shirt or layered beneath a winter coat. If you prefer something with a little more personality, consider a dusty sage, warm oat, or soft blush, all of which carry the texture beautifully without competing with it. This is the kind of scarf that works equally well at a farmers market on a cool autumn morning as it does at a dinner table lit by candles.
Materials and Tools
For the Crochet Honeycomb Scarf, a DK weight cotton or cotton-blend yarn is an excellent choice, offering the stitch definition needed to make those raised honeycomb cells truly pop. A 4mm crochet hook gives you just the right tension to keep the fabric open and fluid without losing the crispness of the pattern structure. If you want a slightly softer drape with a natural sheen, a bamboo-cotton blend in DK weight is worth considering, as it flows beautifully through the fingers and blocks to a clean finish. Keep a yarn needle close at hand for weaving in ends and attaching the fringe along the border.

Stitch by Stitch
The Crochet Honeycomb Scarf draws on a small collection of familiar stitches that combine to create its signature raised texture.
BULLET:CH (Chain) The foundation of the scarf and the spacing element within each honeycomb cluster, giving the cells their open, breathable form.
BULLET:SC (Single Crochet) Used to anchor clusters and create the tight, neat transitions between pattern repeats that keep the fabric stable.
BULLET:DC (Double Crochet) The primary building stitch of each honeycomb cell, worked in groups to create the rounded, raised bobble-like clusters.
BULLET:YO (Yarn Over) A repeated motion throughout the DC clusters that gives each stitch its height and contributes to the three-dimensional relief effect across the fabric.
Once your hands settle into the rhythm of cluster, chain, anchor, the pattern becomes genuinely meditative, the kind of making that quiets the mind and fills an evening with gentle purpose.
Construction
The Crochet Honeycomb Scarf is worked flat in long rows, building from a foundation chain to the full length of the scarf before the fringe is added separately along the finished edge. Each row builds the honeycomb cells in a staggered offset, which is what creates that satisfying diagonal visual rhythm across the surface, and the construction is straightforward enough for a beginner who has worked DC clusters before. The full step-by-step tutorial, including the exact stitch counts and row instructions, is available in the video tutorial linked with this post, and it walks through every stage with clarity and care. If you want a wider wrap rather than a traditional scarf, simply increase your starting chain in multiples of the pattern repeat before you begin.
Wearing Your Honeycomb Scarf
Drape the Crochet Honeycomb Scarf loosely over the shoulders like a shawlette for an effortless layered look over a simple knit or button-down shirt. It also works beautifully wrapped once around the neck with the fringe falling forward, giving a boho-influenced finish that pairs naturally with wide-leg trousers or a midi skirt. Once you finish yours, you will likely find yourself reaching for it every time the air turns cool.
Washing and Storing Your Honeycomb Scarf
Because the raised texture of this scarf is what makes it so special, a little care in washing goes a long way toward keeping those honeycomb cells looking full and defined. Hand wash gently in cool water with a mild wool or delicate wash, then press out excess water carefully without wringing, which can distort the cluster stitches. Lay the scarf flat on a clean towel to block and dry, gently coaxing the fringe into even, straight lines as it sets. Once dry, store it loosely folded or rolled rather than compressed under other items, so the texture stays lifted and the fringe stays tangle-free.
Every stitch of a handmade scarf carries something that manufactured fabric simply cannot, and the Crochet Honeycomb Scarf is a beautiful reminder of what patient, intentional making feels like in your hands. Save this post to your Pinterest boards and share your finished scarf with the tag so the whole community can admire what you have made.
Follow us on Pinterest and subscribe to the Newsletter so you don’t miss a thing!
Tutorial and photos of this honeycomb scarf by: tallermanualperu.