
Crochet Granny Square Joining is the quiet art of making separate things whole. It carries the feeling of a slow Sunday afternoon, squares laid out like memories waiting to be woven into something lasting.
The Granny Square Joining
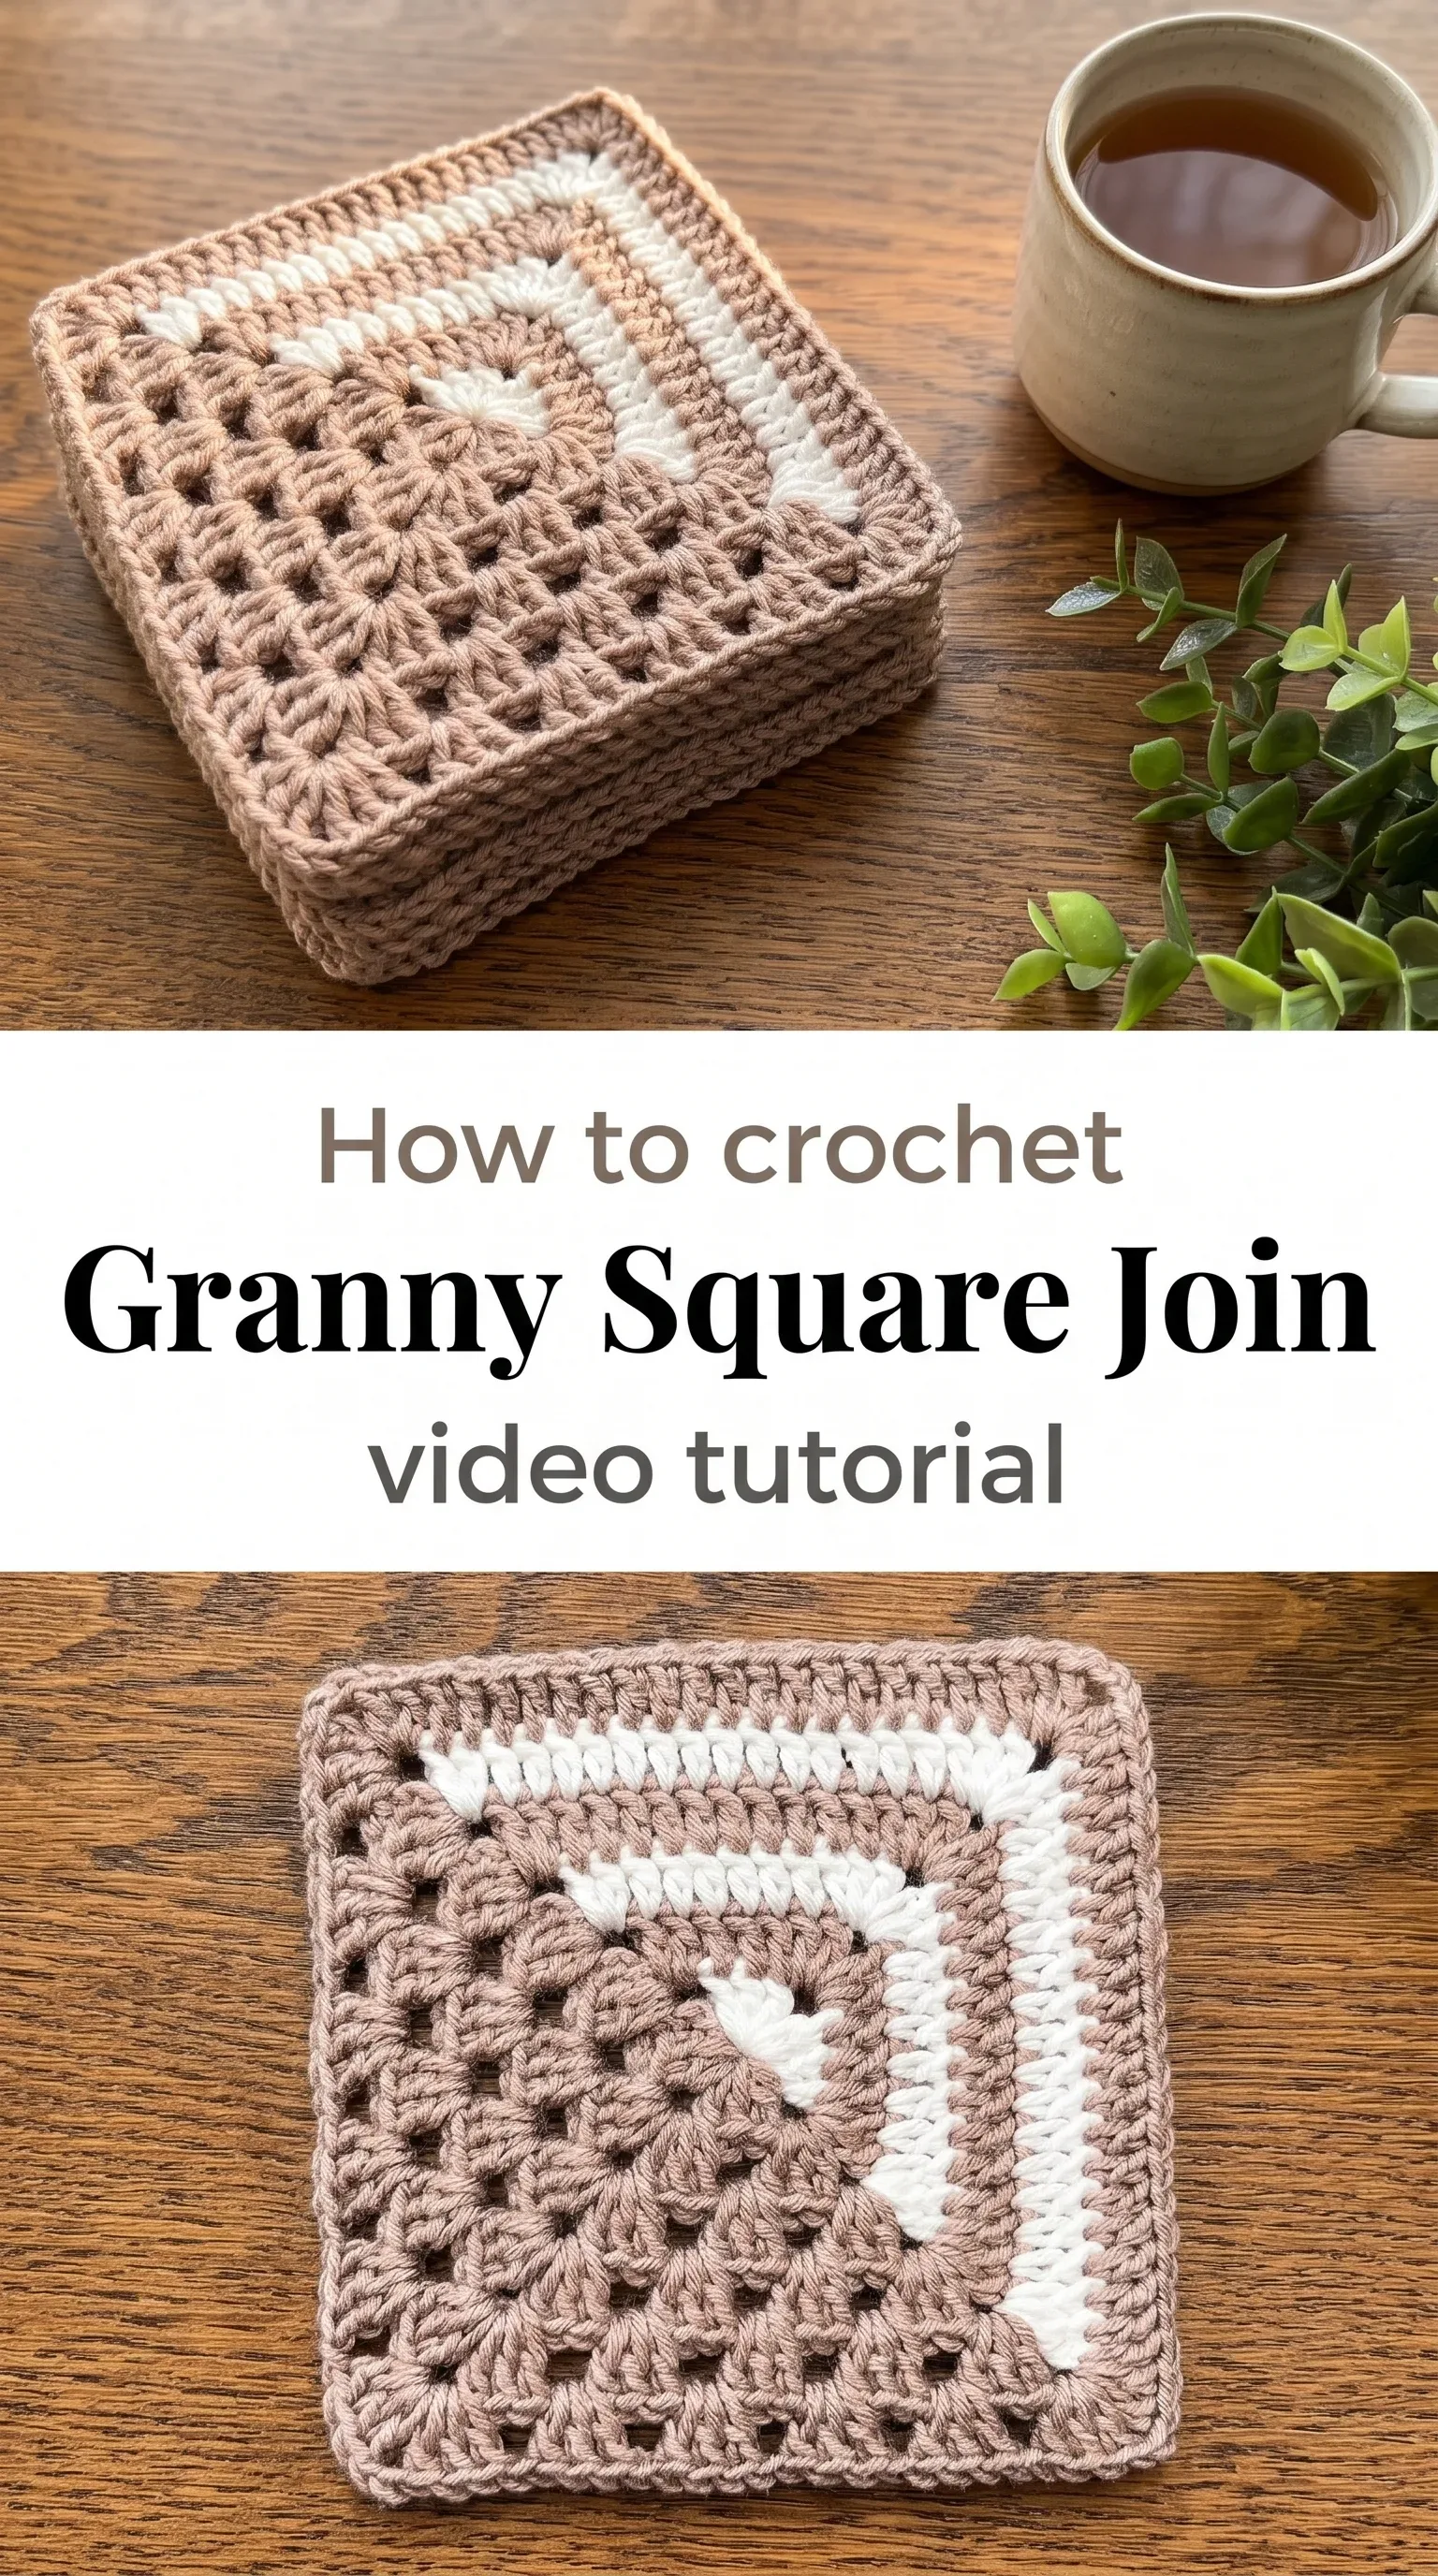
Today’s guide is a love letter to the craft of bringing individual granny squares together into something airy yet structured, textural yet refined. The technique of Crochet Granny Square Joining transforms a collection of small, lacy squares into coasters, blankets, or wall panels that feel intentional and handcrafted in the most beautiful sense. This particular approach, beautifully demonstrated in the video tutorial from Knitting Time, uses a warm taupe and crisp white colour combination that feels both modern and nostalgic at once. Whether you are a confident beginner or someone who has been crocheting for years, this method will settle into your hands like something you already know.
Square Joining Related Posts:
- Crochet Hemp Leaf Doily: A Delicate Circular Masterpiece
- Crochet Twisted Coaster: A Charming Table Essential
- Crochet Rose Bouquet: A Romantic Floral Masterpiece
- Crochet Gradient Stitch: A Stunning Visual Masterpiece
The colour palette here whispers of linen cupboards and quiet mornings, that particular taupe sitting somewhere between blush and grey, paired with clean white for contrast. You could just as easily work these squares in sage and cream, dusty rose and ecru, or even a deep navy with a warm sand tone for something bolder. The beauty of Crochet Granny Square Joining is that the structure of the technique holds regardless of what colours you bring to it, making every finished set feel entirely your own.
Materials and Tools
For a project like this, reach for a worsted weight cotton yarn, which gives the squares that satisfying body and slight stiffness that makes them lay flat beautifully as coasters or small home decor pieces. A 4mm crochet hook is the sweet spot here, offering enough control for the lacy cluster sections while keeping the joining rows neat and even. Cotton is particularly ideal for this kind of home decor project because it blocks cleanly, holds its square shape without much coaxing, and washes without drama. Keep a yarn needle close at hand for weaving in ends between rounds, and a few stitch markers will help you keep track of corner spaces as you build outward.
Stitch by Stitch
This pattern draws on a small and satisfying collection of stitches that build the lacy granny structure and the solid joining border.
BULLET:CH (Chain) The foundation of every round and the bridge between cluster groups, creating those characteristic open spaces in the granny pattern.
BULLET:SC (Single Crochet) Used along the joining border to create the clean, firm edges that hold the squares together with quiet precision.
BULLET:DC (Double Crochet) The workhorse of the granny clusters, worked in groups of three to create that familiar, pillowy texture across each square.
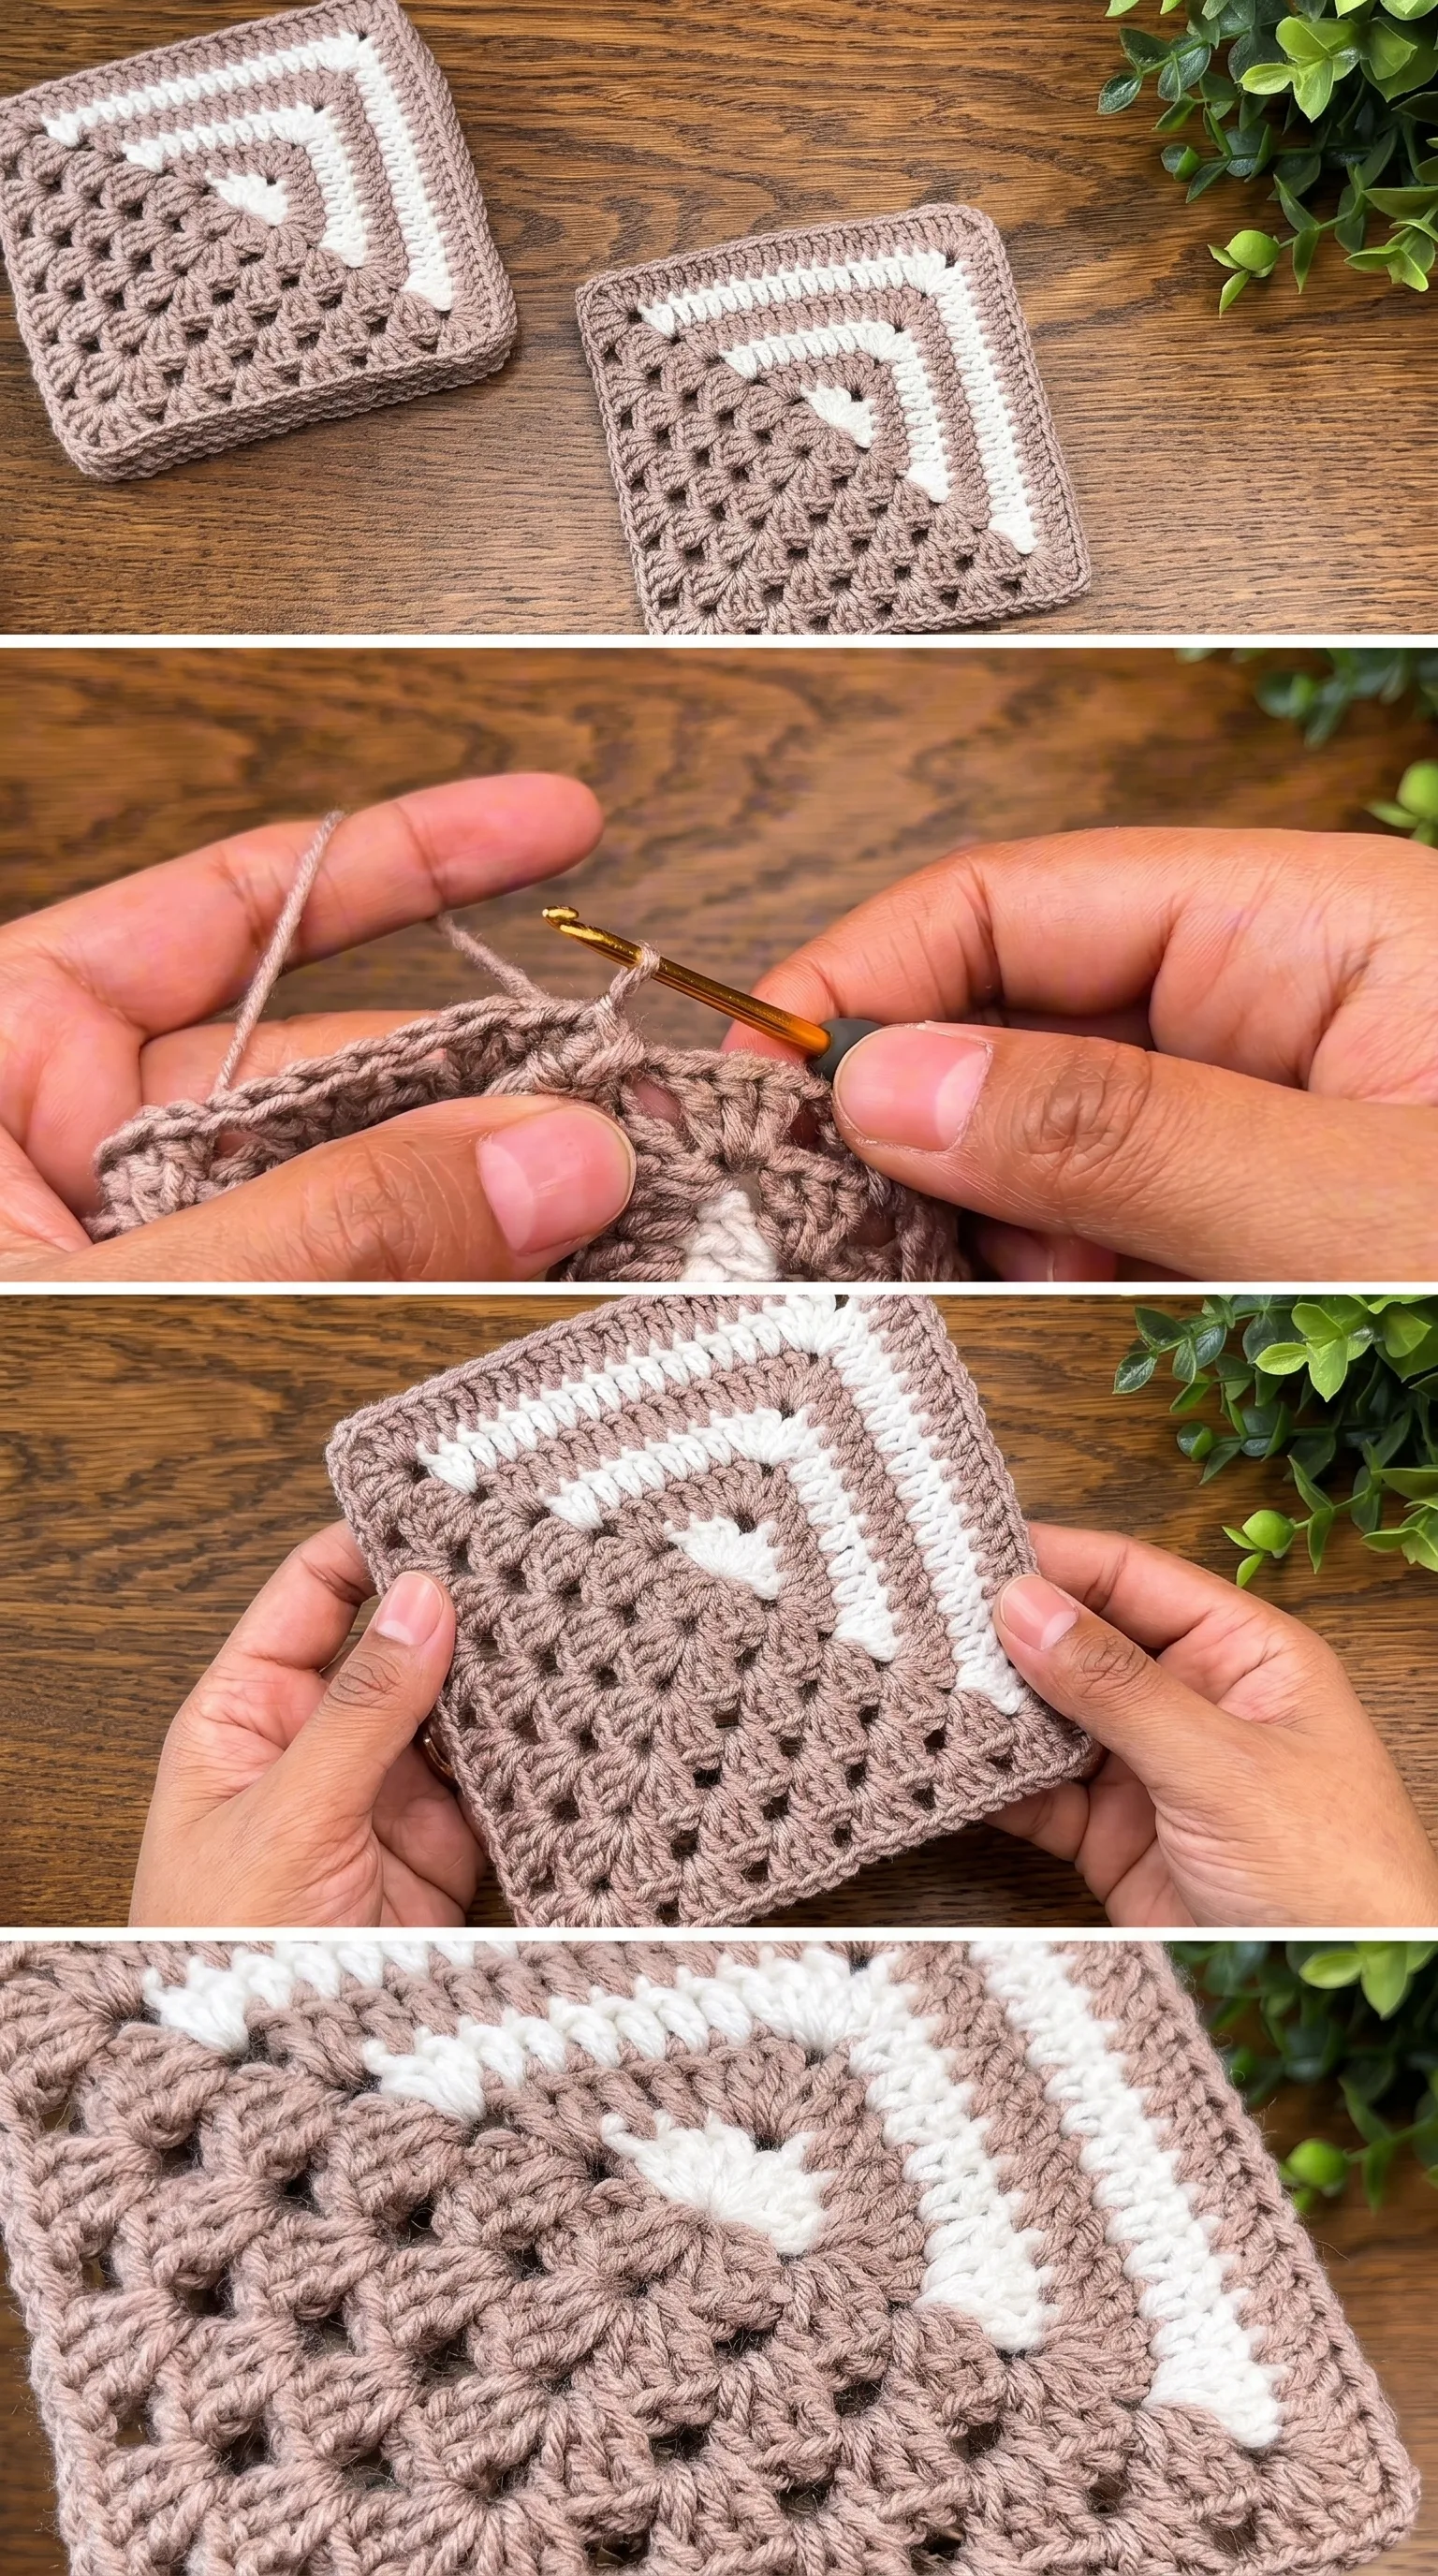
BULLET:SL ST (Slip Stitch) The invisible connector used to close rounds and, crucially, to join finished squares together in a flat, seamless seam.
There is a meditative rhythm to working granny clusters, the repeat of three DC, chain two, three DC settling into your hands after just one or two rounds, letting your mind soften while your hook keeps moving.
Construction
Each square begins from a central magic ring and grows outward in rounds, with the cluster groups fanning out from each corner to create that open, geometric structure seen in the finished coasters. The Crochet Granny Square Joining happens along the final border round, where SC stitches and SL STs are used to connect individual squares edge to edge, creating a flat and nearly invisible seam that reads as part of the design rather than an afterthought. The video tutorial from Knitting Time walks through every stage of this process with clear close-up footage, making it approachable even if you have never joined squares before. If you want to customise the size of your finished piece, simply increase the number of rounds in each individual square before joining, and the method scales beautifully.
Wearing Your Granny Square Joining
A finished set of joined granny squares like these works effortlessly as a set of coasters stacked on a coffee table, a small trivet beside a teapot, or a decorative mat beneath a candle or plant pot. Layer them across a bedside table with a ceramic mug and a small trailing plant and they look entirely intentional, the kind of handmade detail that makes a room feel lived in and loved. Once you have mastered the joining technique, you will find yourself reaching for it again in larger projects like lap blankets or cushion covers, because the satisfaction of watching individual squares become a unified whole never really fades.
Keeping Your Granny Square Coasters Looking Their Best
Once your squares are joined and ends are woven in securely, wet blocking is the single best thing you can do for them, pinning each piece out to its true square shape on a foam mat and allowing it to dry completely before use. Cotton responds beautifully to blocking and will hold that crisp, even shape through many washes without losing its structure. For ongoing care, machine wash on a gentle cycle in cold water and lay flat to dry rather than tumble drying, which can cause the clusters to pull unevenly over time. Store finished coasters stacked flat or rolled loosely, keeping them away from prolonged direct sunlight which can gradually lift the colour from natural cotton fibres.
Every square you finish and every seam you close is a small act of making that belongs entirely to you, and Crochet Granny Square Joining is one of those techniques that quietly builds your confidence with every round. Save this article to your crochet board on Pinterest and share your finished squares so others can find their way to this pattern too.
Follow us on Pinterest and subscribe to the Newsletter so you don’t miss a thing!
Tutorial and photos of this granny square joining by: Knitting time🧶by Dina.