
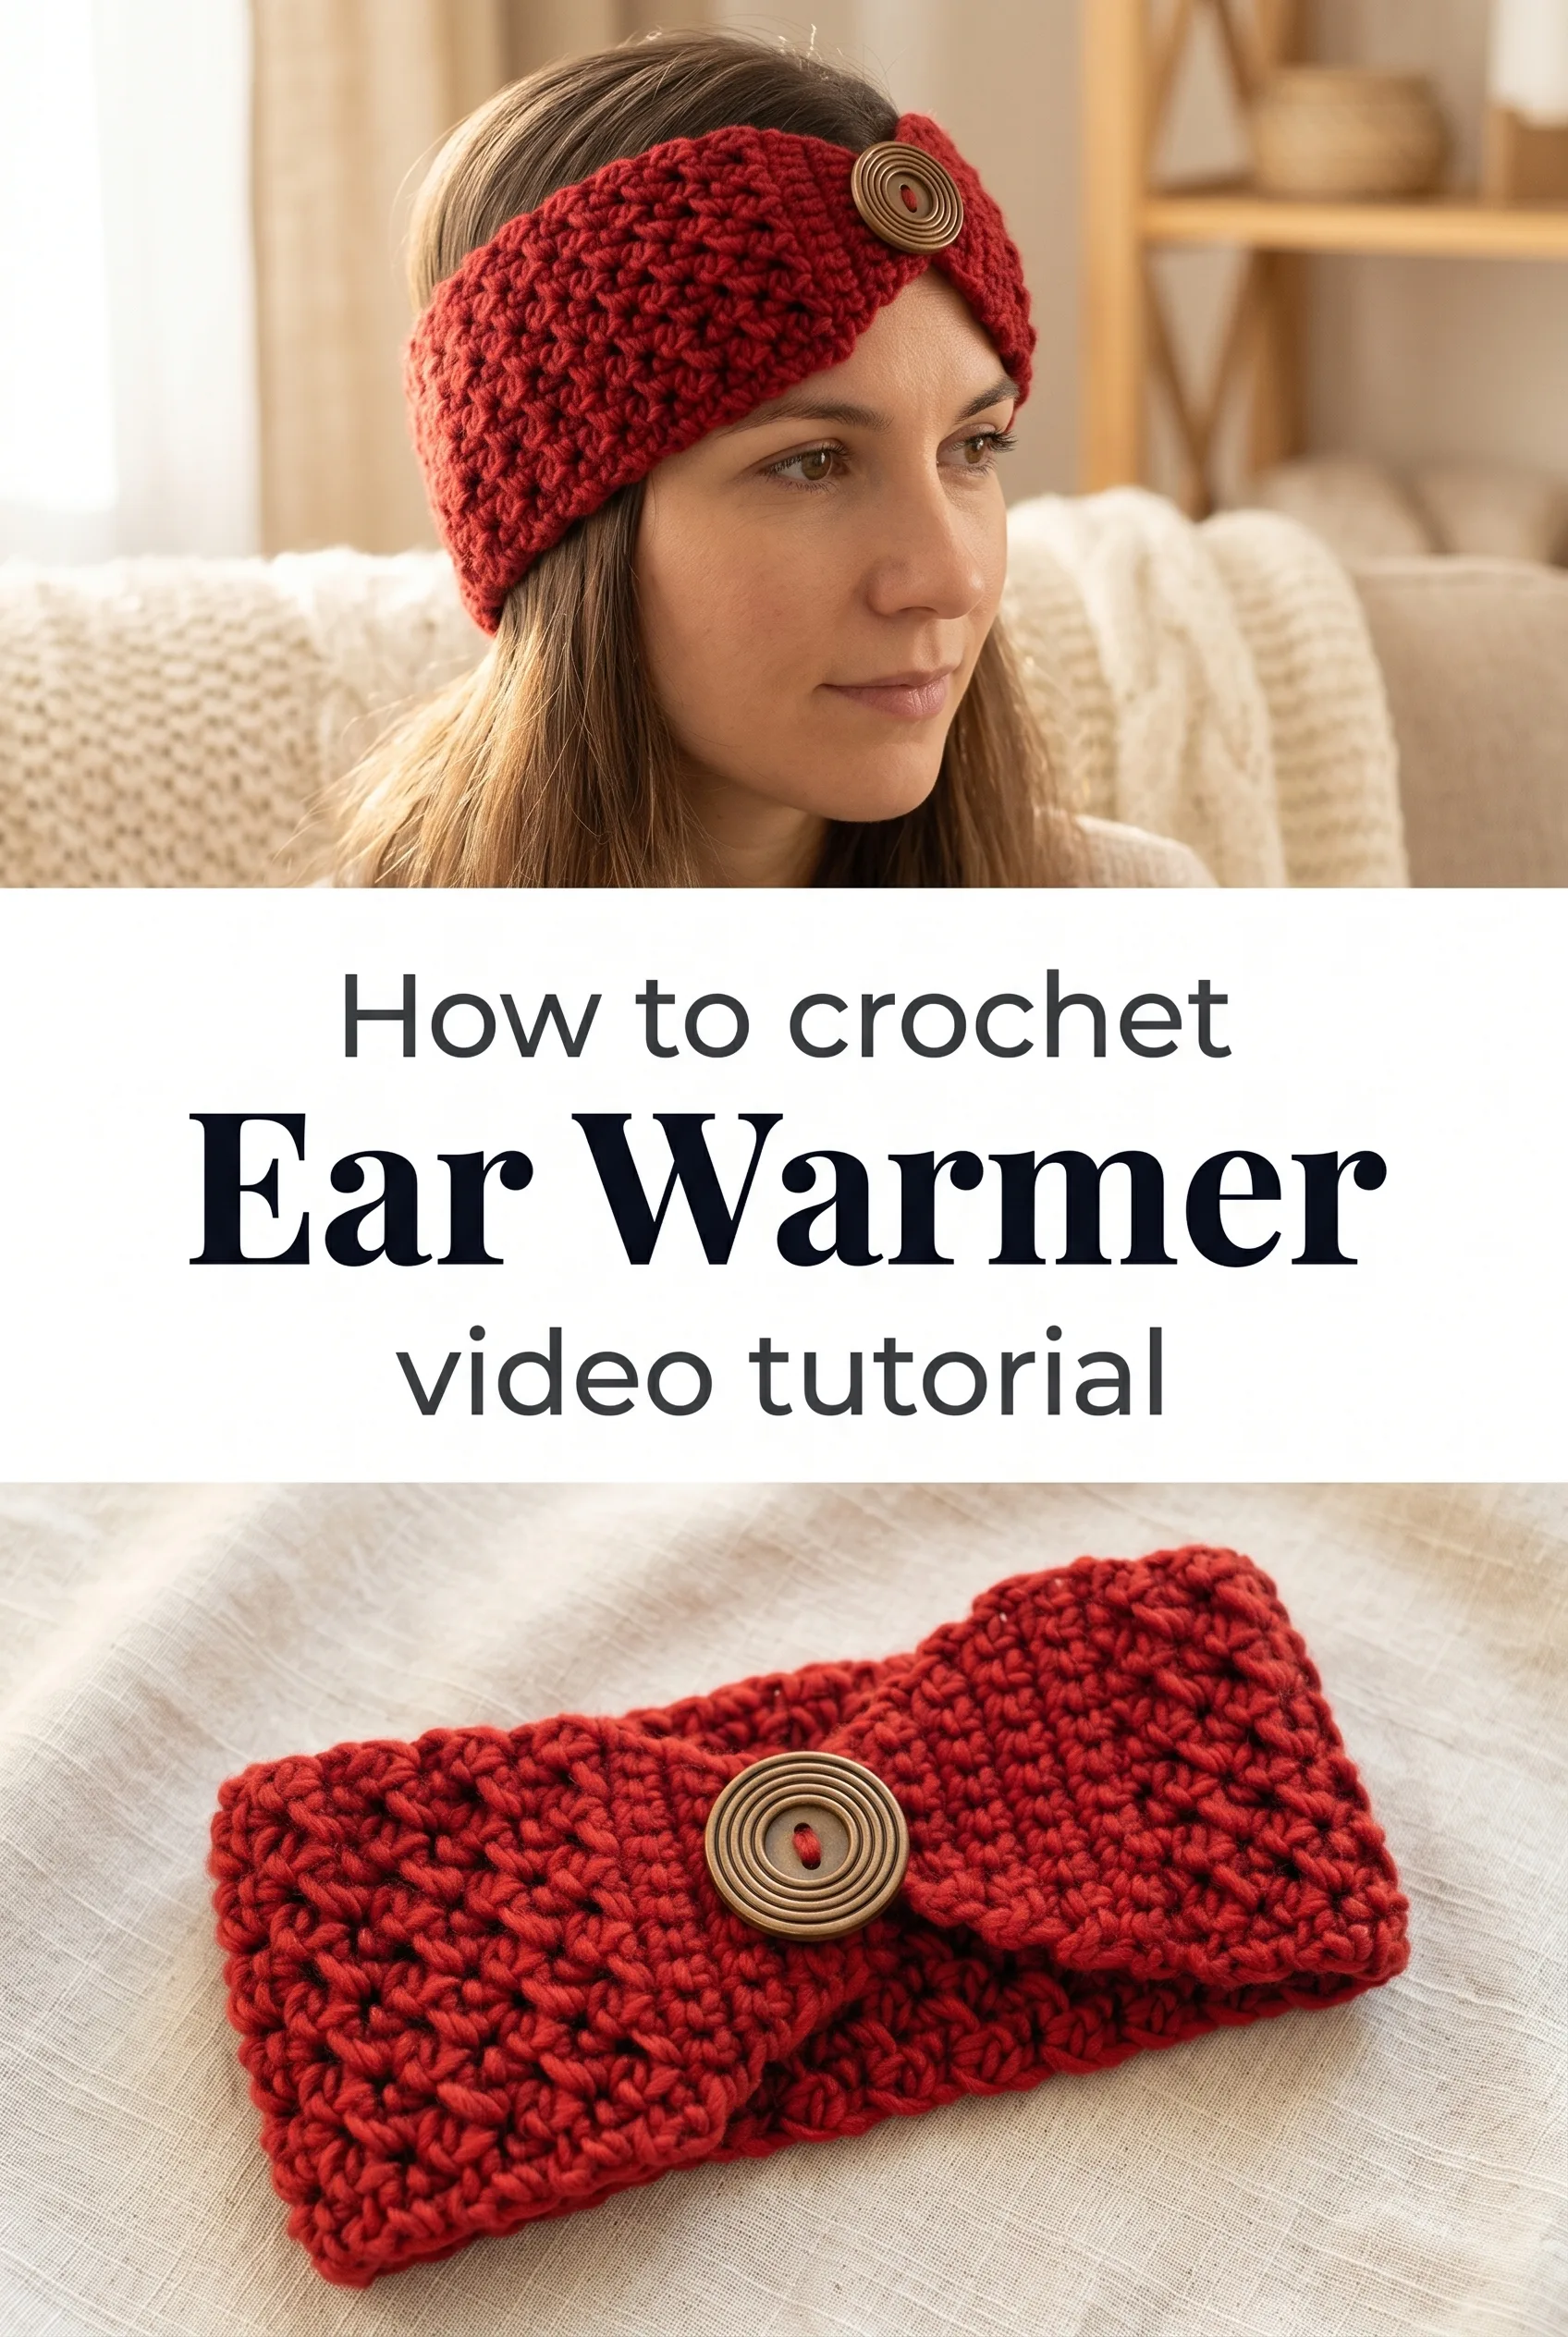
I am so genuinely excited to share this Crochet Ear Warmer tutorial with you, because it has completely won me over. The way the textured stitch work and that gorgeous wooden button come together creates something that feels both rustic and refined, like a small handmade luxury you can wear every single day.
The Ear Warmer
A Crochet Ear Warmer sits somewhere between practical winterwear and wearable art, and this particular one leans beautifully into both. The rich red yarn works up into a dense, airy yet structured band that wraps the ears in softness without overwhelming the face. It is wide enough to make a statement and tapered just slightly at the center where the button closure pulls the whole design inward with a whisper of elegance. This is a piece for the person who wants to feel put-together on a cold morning walk, a school run, or a slow weekend at the farmers market.
Ear Warmer Related Posts:
- Crochet Market Tote: A Breezy Summer Essential
- Crochet Andes Headband: A Timeless Winter Essential
- Crochet Granny Square Tote: A Charming Summer Essential
- Crochet Sunflower Bag: A Cheerful Summer Essential
Red is the hero color shown in the tutorial, and what a bold, joyful choice it is against grey coats and cream scarves. But this Crochet Ear Warmer would be equally lovely in deep forest green, oatmeal, dusty rose, or even a rich charcoal that leans into a more understated palette. The wooden button detail reads as vintage and grounded, and it coordinates naturally with almost any neutral accessory in your wardrobe.
Materials and Tools
For this Crochet Ear Warmer, you will want a bulky weight yarn, which gives you that satisfying, cushioned thickness you can see in the finished piece. The tutorial uses a vibrant red yarn that has a slightly woolly texture, and a natural wool or wool-blend in bulky weight will give you the same cozy, structured result with beautiful stitch definition. A 6mm or 6.5mm crochet hook works well at this weight, allowing the stitches to sit close but not stiff. You will also need a large wooden button, a yarn needle for weaving in ends, and a small length of thread to sew the button securely in place.
Stitch by Stitch
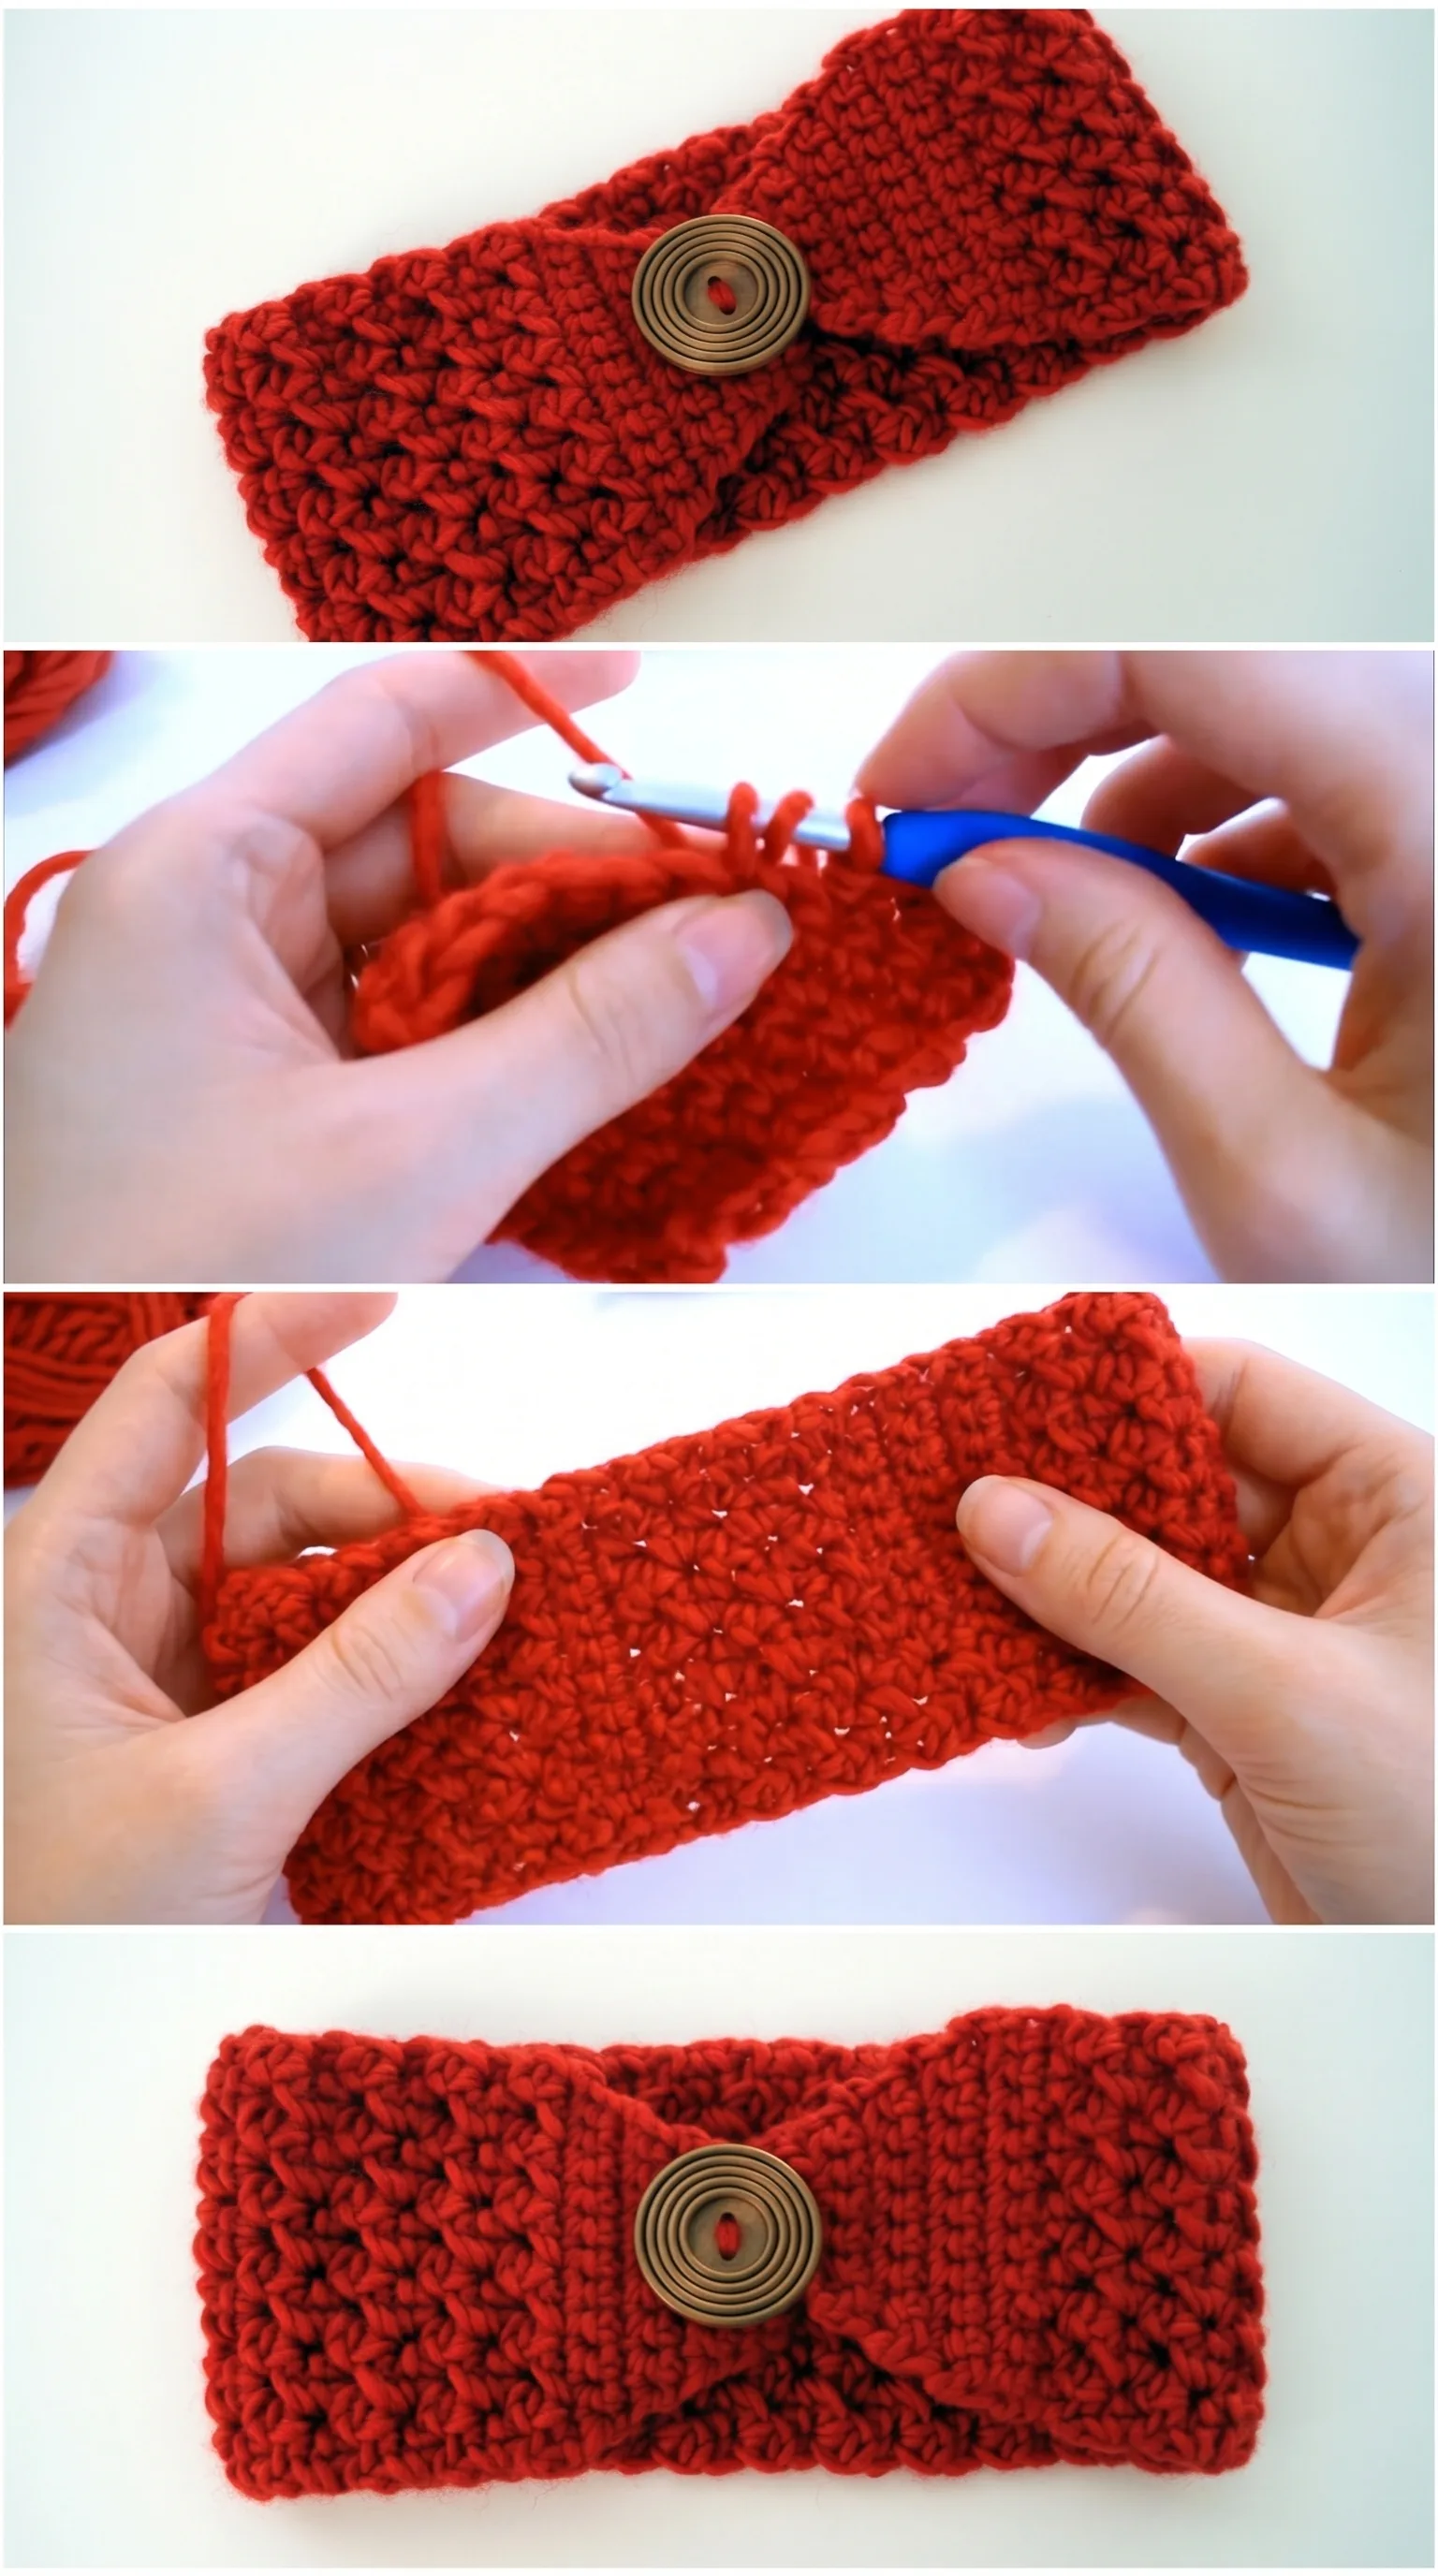
This Crochet Ear Warmer uses a small, satisfying collection of stitches that beginners can pick up quickly.
BULLET:CH (Chain) The foundation of the piece, worked to your desired length before you begin building the textured body of the band.
BULLET:SC (Single Crochet) A tight, compact stitch used to create dense rows that give the ear warmer its warmth and solidity.
BULLET:DC (Double Crochet) Worked in alternating pattern with SC stitches to build the beautiful raised texture visible across the surface.
BULLET:Slip Stitch Used to join rounds or finish edges cleanly, giving the ear warmer its neat, professional border.
There is a meditative rhythm to working these stitches back and forth in rows, the hook dipping and pulling, the fabric growing thicker and more lush with every pass, making this the kind of project you reach for at the end of a long day.
Construction
The ear warmer is worked flat in rows, creating a rectangular panel that is then folded and joined at the center to form that gentle gathered shape you can see in the finished photos. One end of the band has a buttonhole worked into it naturally through the stitch pattern, while the other end holds the wooden button sewn on with coordinating thread. The construction is refreshingly straightforward, which makes it a wonderful project for someone moving from their very first crochet pieces into more wearable, gift-worthy accessories. To customize the fit, simply adjust your starting chain length before you begin, working a few extra or fewer chains to suit a smaller or larger head circumference.
Wearing Your Ear Warmer
Pull this Crochet Ear Warmer on over loose, wavy hair for a relaxed weekend look, or wear it with a sleek low bun to let the button detail take center stage. It pairs beautifully with a chunky knit coat and leather gloves for a composed winter outfit, or with a simple denim jacket and boots for something more casual and effortless. Once you finish this one, you will immediately want to cast on another in a different color for a friend.
Keeping Your Ear Warmer Fresh All Winter
Because this Crochet Ear Warmer is worked in a bulky wool or wool-blend yarn, gentle hand washing in cool water with a mild wool wash is the kindest way to clean it. Press out excess water by rolling the band in a clean towel, then reshape it gently and lay it flat on a dry surface away from direct heat to dry. If the fabric feels slightly uneven after washing, a light steam block using a damp cloth and a warm iron held just above the surface will smooth everything beautifully without flattening the texture. Store it flat or loosely folded in a drawer rather than hung, so the band holds its shape through the whole season.
Every Crochet Ear Warmer you finish is a small, genuine act of making something real with your own hands, and that will never go out of style. Save this article to your Pinterest boards and share your finished piece in your favorite crochet community so others can discover this pattern too.
Follow us on Pinterest and subscribe to the Newsletter so you don’t miss a thing!
Tutorial and photos of this ear warmer by: B.Hooked Crochet.